BlenderMarket - Adjust Vertex Weights v1.4.1: This user-friendly tool simplifies the process of adjusting vertex weights by allowing you to effortlessly modify them with a simple drag-and-drop motion.
During the adjustment, the weights are automatically normalized, providing you with a real-time preview of how your mesh will appear.
Whether you're rigging an elbow or knee, this tool significantly streamlines the process, enabling you to achieve precise skin-folding results. It offers fine control over weights in complex areas influenced by multiple bones.
In addition to aiding in skinning with armatures, this versatile tool proves valuable for managing weights in various scenarios, such as controlling hair density, setting physics goals, adjusting modifier influences, and more.
To utilize the tool, follow these steps:
Vertex Selection:
Begin by selecting specific vertices in either Weight Paint or Edit mode.
Activation:
Activate the tool through the menu by navigating to Weights > Adjust Vertex Weights (in Weight Paint mode). Alternatively, you can set up a custom hotkey (explained below) or access it by pressing Space/F3 and searching for "Adjust Vertex Weights."
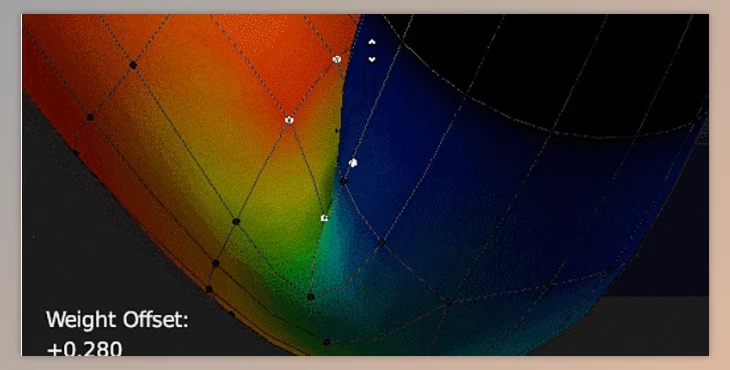
Adjustment:
Once activated, move the mouse vertically to modify the weights of the selected vertices. If the vertices are part of a skin, their movement reflects changes in weight. Locked group weights remain unchanged.
Fine-Tuning and Confirmation:
For more precise adjustments, hold down the Shift key. To confirm the changes, press Enter. To cancel, press Esc.
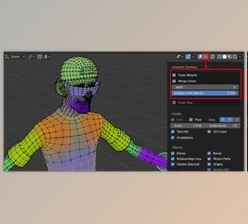
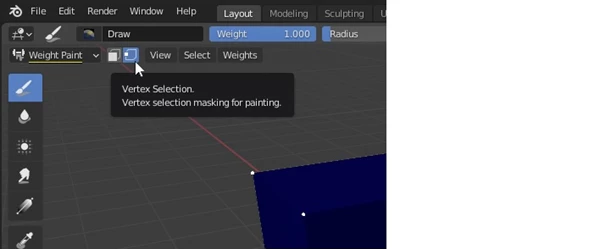
Safety Precaution (Weight Paint Mode):
If working in Weight Paint mode, ensure the Vertex Selection Mask button is activated to visualize the selected vertices that will be adjusted. The tool requires this feature to be enabled for safety and won't initiate otherwise.
Recommended Workflow:
- Pose Analysis: Begin by posing your mesh to identify areas where skinning adjustments are needed.
- Vertex Selection: Select the specific vertices you intend to adjust.
- Lock Vertex Groups: In the Vertex Group panel, go to the dropdown menu and choose "Lock All" to lock all vertex groups.
- Unlock Relevant Vertex Groups: Unlock only the vertex groups that affect the selected vertices. This process can be streamlined using the "Popup Vertex Group List" add-on, available for free.
- Adjust Vertex Weights: Activate the "Adjust Vertex Weights" tool and modify the weights according to your preferences.
Keymap:
Manually add a keymap for this tool by referring to the Blender manual on keymap customization. The operator name is "paint.adjust_vertex_weights," and it can be added to the 3D View > Weight Paint category. For use in mesh Edit mode, consider adding it to the 3D View > Mesh category.
You can also integrate this operator name into pie menus and custom panels based on your preferences.
Removal:
To uninstall this add-on, locate it in the Paint or User categories within your Add-on preferences. Expand its info box and click the "Remove" button to delete it from your Blender setup.
Download Adjust Vertex Weights v1.4.1 (Blender) from the below link now!

Files Password : gfxplugin.com