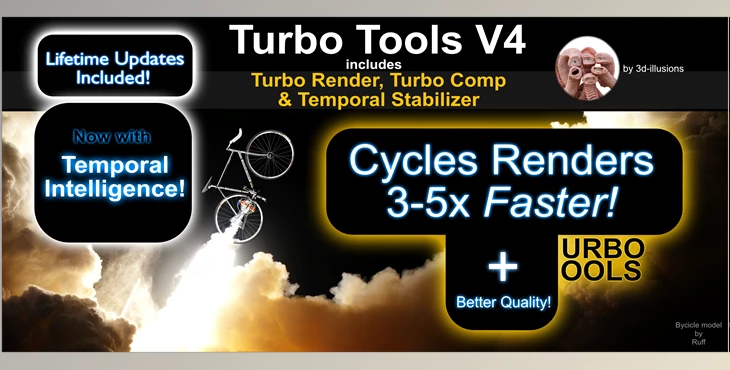
BlenderMarket – Turbo Tools 4.0.9: Major Release of Feature Major Feature Release Turbo Tools Version 4. includes Temporal Intelligence, now integrated into the Temporal Stabilizer, plus 700% more speedy split channel stabilization!
How to maintain time quality and image quality in the Blender Market?
You can use "BlenderMarket – Turbo Tools".
Where can I download the product?
You can download it for free from here.
Gfx plugin details of BlenderMarket – Turbo Tools
The product is in the category from Blender Market, for more information about this post you can click on the home page link in the sidebar.
To search for similar products to BlenderMarket – Turbo Tools, click here.
Turbo Tools is a complete rendering pipeline extension that works with any operating system and hardware Blender supports. The addon comes with:
- Turbo Render Superior render results in only a fraction of the time needed for both GPU or CPU cycles processing. Maintains image quality that standard denoisers can't maintain sometimes, even when supplying them with images that have been rendered for 120X more time! You can expect single-frame renders to be reduced from a few hours to a few minutes for more complex scenes! Watch the video below to learn how Turbo Render could make a GTX 1070 take down an Rtx 4090!
- Temporal Stabilizer is one checkbox. This massive new feature allows per-pass temporal stabilization that allows the time to render animations of static elements of the scene to be cut by as much as 40 times!
- Turbo Comp is a complete compositor suite that supports live playback in real-time and compositing directly within the Compositor's backdrop branch caching, resaving output nodes to file without re-rendering the file output node, automated file output creation, publishing, and many more.
TURBO RENDER
In difficult-to-render scenes (indoor scenes or volumes, scenes that contain high gloss materials with rich SSS, textures, etc.), Turbo Render provides results that OIDN/Optix may need the rendering of up to 120x more to get the same result as the results provided by Turbo Render. If no denoiser is employed, you can expect to render as much as 9000x more to get the same results as Turbo Render (scene dependent). Furthermore, it makes the rendering process by using rendering setting presets designed to give you the desired results without having to delve into the more complicated render settings. It can even work with complicated Compositing configurations without having to rewire your computer!
The tests below were made using the cycles X function in bBlender3.1. To give OIDN and Optix the best chance, they were set up to utilize normals and albedo to aid in denoising. OIDN was set to Prefilter Accurate. I also tried changing the prefilter setting at NONE to determine whether it could help improve the texture comparison results (it did not).
- Scene 1 - high DOF, powerful SSS film set to transparency to test alpha.
- Scene 2 Indoor scene to test the detail of geometry and texture.
The interface is easy to comprehend and provides options to get optimal results for every scene and examples of settings.
Instructions:
Turbo Render can speed up rendering time by a significant amount because it produces high-quality renders using levels that are not enough for Blender's rendering panel denoisers to perform a great job with.
The Open Image Denoiser version(left) 1024 sample with a noise threshold of 0.01. The Turbo variant (proper 324 samples with a noise threshold of 0.1 (ten hundred times less noise). Note that the paint flecks appear preserved with Turbo, and the skin's details are preserved compared to OIDN fuzzy results. (right images in new tabs to see full-size images.)
In this regard, ensure you make the sample settings to the lowest possible level without compromising the image quality. You can accomplish this by using the sample presets or the user-friendly sample preset mode that allows you to change the sample settings manually.
It's important to realize that the most significant benefits (often up to several hours) can be made when rendering scenes that take a lengthy time, even without Turbo Render. Scenes that render fast (under an hour or so) can't be reduced similarly. If the scene is already rendering fast, applying the 'fast/draft' mode of denoise is recommended if you notice wobbly geometry or require individual denoised passes within the Compositor following rendering).
Turbo Render is made with user-friendliness as a primary goal. Within the Turbo Render Options area, click enable, then select the sample preset, which will automatically set your sample settings according to your desired quality, and then select Clean method (combined images or precise passes) to define what's inside the scene, then render. That's it! To generate the final rendering, the turbo render will analyze the scene and other rendering parameters. It is essential to ensure that a default cache folder for all new scenes is set in the addon preferences and that every scene has a valid cache folder and is set before rendering. The cache folder for the scene can be set in the lower part of the Turbo Render options or the Compositor's Turbo tab. If you're using the "User" sample preset and want to reap the most speed improvements, reducing the samples to the minimum you usually require is recommended. Turbo Render is speedy because it can create crisp images from less noisy rendering results, which other denoisers aren't able to. Do The cache folder shouldn't be an absolute location (a path that begins with '//'), the letter "R"), so before you set it, be sure to remove the relative option from the Blender file explorer.
The Turbo Render can be used with
- Still renders
- Animations
- Compositor trees in existence (no matter how complex)
- The rendering of multiple scenes and view layers with the same composite (all scenes will be rendered using each scene's Turbo rendering settings).
- The full range of Turbo Comp features (caching, publishing, resaving output file nodes with no need to re-render, etc.)
Options:
Denoising Modes-
- Draft (clean image exclusively) - The new draft mode is high-speed in denoising. Combined with the enhanced textures option, you can get results that could easily surpass what is expected of a render in draft mode, even at shallow samples. This is especially useful for final renders that render to a noise-free level within less than 10 seconds because of its quick processing time.
- Medium (clean image solely) - The medium alternative is slightly slower than Draft; however, on louder images, it will provide better overall clarity, especially in reflections.
- HD (clean images solely) - The high mode offers the finest lighting, shadows, and reflections of all other modes, but not the ultra mode does not. This is appropriate for final renders when the individual denoised pass isn't required to compose.
- Ultra(cleans every necessary pass)Cleans all necessary passesThis. This is a way to cleanse individual passes for later use in the Compositor and fix any wobbly geometry found in lower presets. The scene's content and render settings will determine the cleaned pass. This mode is also utilized if the other modes do not produce excellent geometry detail. Important: If you plan to utilize the individual cleaned passes in an underlying compositor from a third party or other Compositor, you may make use of the rendering layer cache that's located in the cache folder that you choose, or if you prefer a different format, you can create an output node for files directly via the rendering layer's node. Blender's output is altered to be light, like ffmpeg, as it can only output only the image denoised pass and not autres denoised ones. If your passes are digital data, such as crypto mattes, you should utilize EXR 32 bits.
Cycles Speedup Options :
- Optimize HDRI Optimise HDRI This optimizes important map performance, resulting in possible faster rendering speeds and lower memory usage. The improvements will be evident in HDRI world-class environments at least 8k and reduce memory usage when rendering by approximately 1GB for a 16-k HDRI.
- Prevent Fireflies- Recommended. This can reduce the risk of fireflies and offer an opportunity for a massive rendering time reduction (scene dependent).
Example Presets: A high-quality level for any occasion. There is no need to fumble around finding the perfect rendering sample settings. Simply select the desired quality and then hit render. Modals include Crap Medium High, Ultra, Insane, and User. You might want to use your custom settings when you are animating since they have been optimized to produce fast still images. Utilizing them for animation could cause inconsistent images between frames.
Extremely dirty Very dirty is a good choice when using extremely low-quality samples or having some noise after denoising them.
Scenes in the Interior Scene -Adjust the render presets to provide better results for interior scenes and scenes with lots of indirect lighting.
AnimationThis optimizes your presets of choice for animations.
Improve Textures: The enhancement will preserve the texture's detail even at low sample rates. When in draft mode, it can enhance shadows and reflections.
Visible to the Camera: Utilize these options to determine what the camera can detect. This, combined with other rendering settings (light bounces, film, etc.), will allow the system to select the most efficient method to get the highest quality outcomes. Remove any settings that are not necessary to make sure that the process is as fast as possible. Turning on heavy DOF/Motion Blur Emission and activating the 'behind volume sub-options aren't always needed (particularly in higher rendering settings), so try turning them off for better performance. Only enable if you notice noise around an object's edges or behind the volume.
Problem-solving - Automatically correct standard rendering issues when they're apparent after rendering. Only enable it when you're faced with issues; when the issue isn't apparent, the workarounds could affect rendering speed or the gloss level (depending on which option you choose to enable). Is essential. Suppose you have enabled the swirly/blotchy artifacts feature and activated the option 'animation' on the Turbo render settings. In that case, you should change the sample preset to the user, remove the noise threshold checkbox, and then set your sample. This is because if the swirly artifacts option has been enabled, adaptive sampling is turned off, which means that the maximum number of samples will be used for every pixel. Furthermore, animation options can increase the maximum sample count to a minimum of 600 (even when you set a crap sample), which could lead to excessively long rendering times.
Checklist:
- Ensure that you've chosen the smallest possible sample to set to your specific scene. Turbo Render's speed boost can only be achieved by using lower sample rates than what is typically used. Find the optimal setting fast by rendering a tiny part of the loudest region within the rendered. Re-render and reduce the sample until you get the lowest amount of samples that won't affect image quality. Then, turn off the render region before rendering correctly. You should consider using the sample preset for 'User' mode to get the best control. This allows you to set the optimal noise thresholds for minimum and maximum samples.
- A render cache directory is defined but not an absolute path. It needs to be an absolute path such as 'c://something/something/' and not '//something/.'
- Be sure to have very dirty' turned on at low samples, or you'll see the noise after denoising.
- Be sure to put an asterisk within the "visible to camera" section of each surface type you see in the scene. If you don't, it could result in elements not being identified. Do not select options that aren't part of the scene, as this could increase the render time in a way that isn't needed.
- If your camera has a strong DOF or motion blur, and you see an increase in noise within those areas following rendering, select the 'Heavy DOF/Motion blur option. It is easy to tell if a scene is DOF by noticing that distant or near objects appear blurry compared to focal points.
- Do not enable the option to 'optimize HDRI for scenes that do not use an HDRI in the real world or if the HDRI has a minor more significant than the 4096-pixel width.
- Use the 'avoid fireflies' option when shooting scenes with intense lighting or an HDRI, as otherwise, the intensity of reflections and highlights will be affected.
- Blender's output isn't configured to support multilayer EXR. If you require multilayer EXR In the Compositor you use from a third party, you must muse the rendering layer cache created using turbo render.
- Beware of the primary BSDF's Sheen option to get the best results.
Publishing will create a new animation using your latest rendered frames, which have the active rendering layer within the Compositor. You can save the animation or frame using the location and format specified within Blender's export settings. Audio can be included in all movie formats when you've got audio on the VSE (ensure no video is included inside your VSE, or it'll be given precedence over the Compositor). Animation flicker is also removed when publishing by enabling the remote temporal flicker' choice.
Publish Current Frame
Saves the output of the Compositor's process as an image still to the specified location and format chosen by Blender's output property panels.
Publish Animation
The results of the Compositor as an image sequence or animation in the format and location that Blender's output property panel has specified.
Remove Temporal Flicker
Eliminates the flicker due to denoisers constantly producing an unintendedly different result on every frame.
Include File Output Nodes
If this option is enabled, any unmuted file output node creates a new image sequence with full resolution (handy for generating multiple versions). It is important to note that the composite option will only create movies with audio.
Quick Publish
Quick publish uses this cache to make a publication without recalculating the tree. It's an excellent idea to create an entirely cached node following the parts of your tree that aren't planned to be edited after rendering. This will result in generating a cache as you render ( an advantage compared to rendering your renders with an external compositor).
reviewers view
Editors of images set to viewer node mode will display how far they have gone through the publication process. This is very useful. iiftemporal stabilization is turned on since it allows users to detect issues immediately instead of waiting until the whole animation is processed, which means you'll be able to identify the best settings for each scene quickly.
temporal intelligence
A brand new suite of tools to analyze the rendering to prevent artifacts. This allows the temporal Stabilizer to be used for more complex animations than were before feasible.
is only for surfaces
Limits stabilization to 3D geometry to prevent artifacts from the environment and other non-geometry elements. The temporalisealiasing setting can regulate the extent to which anti-aliasing occurs between the 3D geometry and the stabilized environment. Setting it to a low level will prevent the appearance of jagged edges or inaccurately colored pixels surrounding objects. It also prevents the ghosting of objects within the environment. The temporal data can only be created for local environments, So make sure linked worlds are local if you plan to use this feature during publication.
Motion analysis
motion analysis can analyze the motion of geometry over multiple frames to eliminate any artifact, excluding reflections or behind glass.
max deviation
Eliminate pixels from temporalization when they are more significant than the threshold of this distance from the movement expected.
smooth
The stabilized pixels will be mixed in with unstabilized pixels, depending on the degree of proximity to the threshold of tolerance they are to the tolerance threshold. If a pixel is near the threshold of tolerance, the pixel will be essentially the original pixel. If the pixel falls from the threshold, it will likely be stabilized. This can help to avoid apparent shifts. 0.02 is generally a good value
variable tolerance
The tolerance will grow with the distance from the camera. You can enable it if distant objects still flicker. However, you are unable to increase the tolerance without creating artifacts in geometry close in proximity to your camera. Avoid it if you can, as this can increase the duration of stabilizing every frame. The increment number determines how much tolerance will grow by each scene unit (measured between the camera and the pixels).
Depth perception
Examine the distance of each pixel from your camera over frames. It helps eliminate artifacts and general artifacts that occur in mirrors and glass.
max deviation
The maximum distance a pixel can move away or towards the camera in between frames. A more significant amount of movement could cause the pixel not to be stabilized to prevent artifacts. There will be no stabilization if it is too low; 0.5 is usually a decent number.
The smooth and the variable tolerance perform similarly to the ones described in the section on motion analysis above.
Recognition of surfaces
Takes into account the position of the pixels about the surfaces of the objects. Pixels can only be stabilized if the same spot on the surface of the object's surfaced tolerance. This is useful if artifacts are visible on complex moving objects, like wheels or cogs, and motion analysis or depth perception cannot be resolved. This temporal information is only created for objects that have editable materials. Therefore, ensure that all linked materials are local if you plan to use this feature during publication.
tolerance
Increase to allow nearby surface points to help in stabilization. The range of values is 0 to 1; 0 is the exact match, and 1 is the complete length of the object's surface (a fractional portion of Variable and smooth tolerance work similar to the ones described in the section on motion analysis above.
object recognition
Ensuring that all pixels considered to be stabilized are part of one object is essential. It helps prevent the ghosting effect of one thing on other objects while they move across each other. This should not be required in all cases. However, it could be helpful when the motion of an object is extraordinary, and motion analysis or depth perception can't solve the issue. This temporal information is only created for objects that can be edited materials. Therefore, ensure the linked materials are local if you use this feature during publication.
tolerance
Tolerance may seem a good option since objects should not be mixed with another object. However, little tolerance is typically required to prevent artifacts from occurring in anti-aliased areas in which multiple objects may be
The smooth and the variable tolerance work precisely the same way as described in the section on motion analysis earlier.
correct errors
This is a solution for all. It identifies stabilization errors after the fact, and either in whole or part, it reverts to the original version of the pixels. This is the quickest method of correction, but if your animation is flappy and removes artifacts, the program could also reintroduce flicker if more than the allowed changes rectify the flicker!
allowable change
If stabilization has caused a pixel's appearance to change more than the specified amount, then return to the non-stabilized version of the pixels.
smooth
The degree of correction can vary depending on the severity of the error. From 0 to 1, zero means that the pixels are wholly replaced and have undergone more changes than the allowed change. One indicates that the more the pixel has altered, the more it will return to the pixel that was not stabilized.
Eliminate stabilization using masks
.Remove artifacts from elements that aren't fixable without using settings that affect the effectiveness of flicker removal. To do this, create copies of your render layers cache (shift d) and then apply the mix node to join the two identical rendering layers caches. The first should be placed in the top socket 'image while the second one should go to the lower socket called 'image. You can then use a crypto matte or another type of mask to hide particular objects or materials and then use it to control an image node's fac slider. Before publishing, select the first render layers cache. This ensures that only one node is stable while the mix will mix with the second node's unteporalised pixels as specified through the mask. This is an enormous time-saver because it eliminates the extra render time required to render unstable elements separately when they're not causing any visible flicker.
View Published Image
Then, you can open the image file within the editor for images.
View Published Image
Then, you can view the uploaded animation within Blender's animation player.
Temporal Troubleshooting
Anti-aliasing doesn't work well on areas directly through the background, or I see ghosting ticking surfaces to ensure no ghosting within the surrounding environment. Or, in the case that the ghosting is occurring on other geometry, you can utilize the temporal intelligence option to eliminate it.
Transparent objects behind them do not stabilize properly -Increase the alpha threshold in the view layer's properties section. RRaising it above the material's transparency will help the items behind the object produce the vector data required to stabilize them.
What is BlenderMarket-Turbo Tools?
BlenderMarket is a platform that provides a marketplace for add-ons, assets, and resources for Blender, a popular open-source 3D creation suite. Users can buy and sell plugins, models, textures, and other assets to enhance their Blender workflows.
"Turbo Tools" suggests that this product might be a set of tools or add-ons designed to accelerate or streamline certain processes within Blender. These tools could be related to modeling, texturing, animation, or other aspects of the 3D creation process.
Download BlenderMarket – Turbo Tools 4.0.9 from the below link now!
Dear user, you must first login to your account to write your comment.
Please click here to Log in