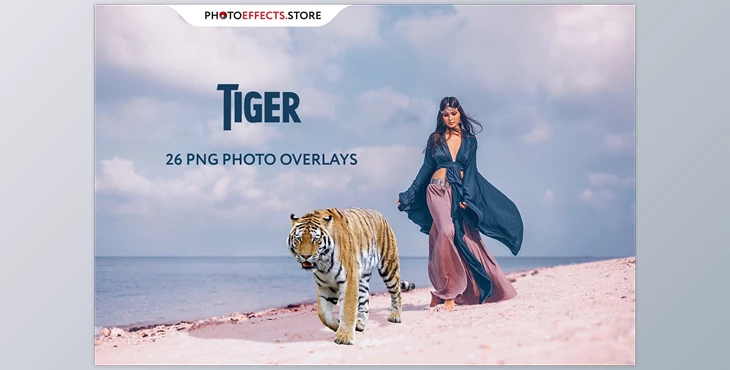
26 Tiger Photo Overlays:
Descriptions and more details from the 26 Tiger Photo Overlays set:
- 26 PNG files
- Width Max 4400px Min 600 px
- Photoshop Step for Ease of Application
Purchase your create best images for your clients!
Be informed
- After the download is complete After downloading is completed, the archive "079. 26 Tiger Image Overlays.zip The file will be saved to the folder titled "Downloads" or the folder you've chosen.
- The archive is unzipped. Copy it into the proper directory. Don't be surprised if the photos within the folder have dark backgrounds. There's Screen Blend Mode that lets you eliminate the background black by displaying only the objects in Photoshop.
- Open Photoshop Open Photoshop, then open the image you plan to apply and follow one of the techniques described below.
INSTRUCTIONS
Three ways of overlaying photos The first is by making use of overlays (include) 2nd - using an instructional course called Quickstart PSD (include just in the Pro version) 3rd is the traditional Drag'n'Drop method.
1ST MODE: OVERLAYS ACTION
It is a much more progressive approach because it allows you to quickly apply overlays of all kinds or even those of other manufacturers. When you define the parameters for this option, you'll be able to use your preferred hotkey F3 (for example) to make sure that with only one click you trigger this process.
- Double-click an overlay Actions.atn The file will open within Photoshop. After installation, you will be able to access the Actions panel within Photoshop by clicking on the Window Actions tab. There are two actions to choose from JPEG and PNG Overlays. The main difference between the Overlay Action JPEG over PNG Overlay Action PNG is the fact that JPEG makes use of the Screen Blend Mode.
- Find "Overlays Action" Click Play the action you wish to perform.
- The Photoshop dialog box pops up and asks you to select the photo. Select 'Continue and then browse to the folder you unzipped. Select the image you like. The image will be instantly uploaded to your Photoshop image file, and it will be displayed.
- Reflect and scale, rotate or scale the overlay, if you'd like
- Input the code CMD (Ctrl) and press Enter the command, and the process creates the layer mask and two adjustment layers. If needed apply black brushes to the mask layer to hide the image, and, within those layers of adjustment, modify the hue or the level of the layer in order to make sure that the overlay appears as intended for the image.
- Save the image, then show it to your clients. They'll be amazed by the results.
- MODE Quickstart course in PSD
This permits you to work in the Photoshop file, where you are able to select the layer that you wish to overlay and then make it visible. This is important because it's visible on thumbnails for layers in the image. However, it can be a challenge to utilize in certain versions that utilize Photoshop the file may not be opening properly. This feature is not mandatory and is available in the form of an.
3RD WAY: DRAG'N'DROP
3.1 Drag from your folder the image you want to save in its Photoshop document. In the case of photos that have black backgrounds, you can apply blend Mode. Change the blend mode, double-click on the image, your style panel will open. Change the blend mode, and then continue with the next steps. In the case of overlays with transparent backgrounds, there is no need to alter any setting. 3.2 Change the scale or the opacity, or even apply a Layer Mask and then paint over the overlay, if needed.
Some Plus
- Compatible with all software that makes use of layers (Photoshop CS5+, Photoshop Elements, Paint Shop Pro, and many more. )
- Not intended for distribution in the future.
- This is an electronic download. The physical item will not be shipped
Download 26 Tiger Photo Overlays from the below link now!
Dear user, you must first login to your account to write your comment.
Please click here to Log in

Files Password : gfxplugin.com