Downloadable Files
You can download the Post Pro product for free at the end of this page.
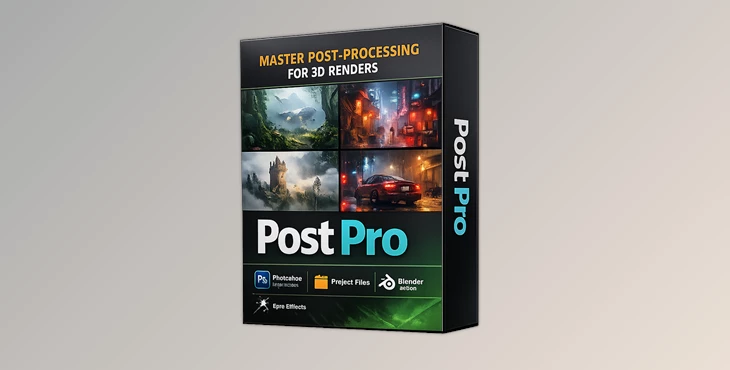
A Quick and Clean Way to Color Grade in Blender
If you work with renders in Blender, you probably know that post-processing can sometimes become complicated. Large node setups, dozens of adjustments, and too many controls can slow down what should be a fast creative step. That’s where Post Pro comes in. This simple compositor node setup is designed to make quick color grading in Blender 5.x easy and intuitive. Instead of building a node tree from scratch every time, you can open a ready-to-use setup, load your EXR render, and start adjusting the look immediately. It’s minimal, practical, and perfect for artists who want to focus on the final look of their render without technical hassle.
What Is a Minimal Post-Processing Setup?
In Blender, post-processing usually happens inside the Compositor, where different nodes are combined to control color, contrast, exposure, and overall image mood. A minimal setup simply means that the node structure only includes essential tools needed for color grading. This approach has several benefits:
- It reduces visual clutter in the node editor.
- It helps artists focus on creative adjustments instead of technical setup.
- It allows faster iteration when testing different looks.
For example, when working with an OpenEXR render, you often want to quickly adjust exposure, tweak color curves, or enable/disable certain grading blocks. With a streamlined node system, you can make these changes in seconds instead of rebuilding the pipeline each time. This results in faster workflows and more consistent visual results, especially when working on multiple shots or renders.
Meet the Tool: Post Pro Minimal Setup
Post Pro – Minimal Setup for Blender is a ready-made compositor template created for fast and efficient color grading. You simply open the provided .blend file, load your render, and start adjusting the nodes. No complicated configuration required. The setup is designed for Blender 5.0 and newer versions and focuses on simplicity while keeping enough flexibility for professional adjustments.
Features
Ready-to-Use Compositor Setup
The project file already contains a clean node structure prepared for post-processing. This means you don’t need to build your compositor network manually every time you start a new project. Just load your render and start working.
OpenEXR Workflow Support
The first node allows you to load an OpenEXR image, which is a common format for high-dynamic-range renders. Using EXR files gives you more flexibility when adjusting:
- exposure
- highlights and shadows
- color balance
This results in higher quality color grading without losing detail.
Quick Node Toggle System
One of the most practical features is the ability to toggle node blocks on or off instantly. By selecting a group of nodes and pressing M, you can quickly enable or disable that section. This makes it easy to:
- compare different grading styles
- test adjustments
- keep your workflow flexible
It’s a simple trick, but it saves a lot of time during experimentation.
Viewer Backdrop Preview
The setup uses Blender’s Viewer Node with Backdrop, allowing you to see your adjustments directly in the compositor workspace. Once the Backdrop option is enabled, you can preview the image while tweaking nodes, which makes color grading feel interactive and immediate.
Flexible Color Management Controls
In addition to nodes, you can refine the final result using Blender’s Color Management panel, including:
- Exposure
- View Transform
- Curves
These tools allow you to make global adjustments to the final image, ensuring your render looks balanced and cinematic.
Pro Tips for Better Results
Even with a minimal setup, a few techniques can make a big difference in the final image. Start with exposure first
Before adjusting colors, balance the overall brightness. Proper exposure makes all other adjustments easier. Use node toggling for comparisons
Turning node blocks on and off lets you quickly see which adjustments actually improve the image. Work gradually
Small changes in curves or color adjustments often produce more natural results than extreme edits. Combine node edits with color management
Sometimes the best results come from combining node adjustments with the Exposure and Curves controls in Blender’s Color Management panel. This layered approach helps create a more polished and cinematic final render.
Exporting Your Final Image
Once your color grading is complete, exporting the final image is straightforward:
- Open the Image Editor window in Blender.
- Select the Viewer Node from the image list.
- Go to Image → Save As.
- Export your image as PNG or JPEG.
This saves the fully color-graded result from the compositor.
Final Thoughts
Post Pro – Minimal Setup for Blender is a simple but powerful tool for artists who want a fast and clean post-processing workflow. Instead of building node networks from scratch, you can jump straight into the creative stage—adjusting colors, testing looks, and refining your render. Its minimal design keeps the compositor organized while still providing enough flexibility for professional-looking results. If you work with Blender renders and want a quicker way to handle color grading, this setup is definitely worth trying.
Dear user, you must first login to your account to write your comment.
Please click here to Log in

Files Password : gfxplugin.com OR 123456