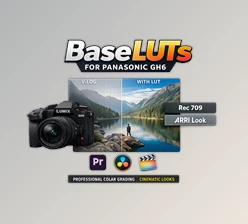
When Your Footage Is Flat, Things Get Tough
Have you used the BaseLUTs for Canon C80 and R5 Mark II professionally or casually? You’ve probably experienced it: when you shoot video, the image on the camera looks very flat and washed out. That means the colors are muted, contrast is low, and the bright and dark details aren’t clearly visible. When your footage looks like this, post-production editing can become really frustrating.
For designers and motion graphics artists, this is a common headache: when the original footage doesn’t show much, you don’t know which colors to adjust, how to set the lighting, or how to match graphic elements with the scene.
For example, imagine you’re working on a motion graphics scene over live-action footage and want everything to match perfectly. If the image comes in flat and desaturated, it's just like working on a gray canvas—there is no indication of which colors are true and which need fixing. Hours of color and lighting adjustment, and still not get what you had in mind.
Cameras and Profiles: Getting Started with Canon Log
Let’s start with cameras and recording modes:
Canon R5 Mark II and Canon C80 → These are the camera models this product is specifically designed for.
Canon Log 2 and Canon Log 3 → These are the camera’s recording modes. When you shoot in these modes:
- The footage is very flat and low-contrast (called flat), so you can perform professional color grading later.
- Log 2 and Log 3 both give flat footage, but their dynamic range differs. This means the amount of detail preserved in the highlights and shadows varies.
What is a LUT and What Does It Do?
This is where LUTs come in:
A LUT (Look-Up Table) is a ready-made file that tells your footage:
"Take these colors and brightness values and transform them into this look that appears natural and viewable."
In other words, a LUT converts your camera’s raw, flat footage into a colored, natural-looking image.
- Format:
.cube - Compatible with editing software like DaVinci Resolve, Adobe Premiere, and Final Cut Pro.
Types of LUTs in This Pack
Inside the zip file, you’ll find two main categories of LUTs:
1. Base LUTs
These are the primary LUTs used for editing and final output:
- C-Log2 → Rec709 → Converts flat camera footage to a look that appears natural on most monitors.
- C-Log3 → Rec709 → Same as above, but specifically for Log 3.
- C-Log2 / 3 → DWG → Designed for professional editing in software like DaVinci Resolve; preserves more colors and details.
- Bold Versions → Slightly higher contrast and more vivid colors than the standard version, for special effects.
2. Monitor LUTs
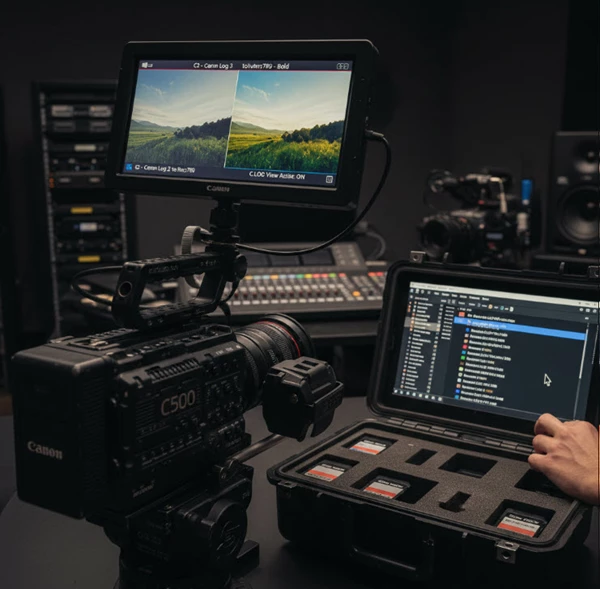
These LUTs are used for monitoring footage while filming:
- When flat and desaturated Log footage is displayed on the camera monitor, a Monitor LUT makes it look close to the final, natural image.
- Files with ML in the name indicate Monitor LUTs.
Workflow Overview
Here’s a simple workflow for using LUTs:
- Shoot footage with Canon R5 Mark II or C80 in Log mode.
- The raw footage will be flat and desaturated.
- To preview footage on a monitor → use Monitor LUTs for a natural-looking image.
- To edit or deliver the final output → use Base LUTs:
- Rec709 → for monitor display
- DWG → for professional editing
Traditional Methods: Before LUTs
Before LUTs, filmmakers and designers had to do a lot manually. Raw Log footage was flat and desaturated, and to make it natural and viewable, you had to adjust it yourself.
The usual process involved manually correcting colors and brightness using tools like Curves, Levels, and Color Correction. It may sound simple, but when you needed to match multiple scenes or clips, the challenge began. Each scene required separate adjustments, and even a small change could cause bright or dark details to be lost.
The main issue with the traditional method was that it was time-consuming and exhausting. Even professional editors could spend hours, and the colors and lighting of all scenes still might not match perfectly. Additionally, there was always a risk of losing details in highlights and shadows since manual adjustments can degrade the image information.
Simply put, working without LUTs was like coloring a digital painting by hand without any shortcuts—time-consuming, difficult, and prone to errors.
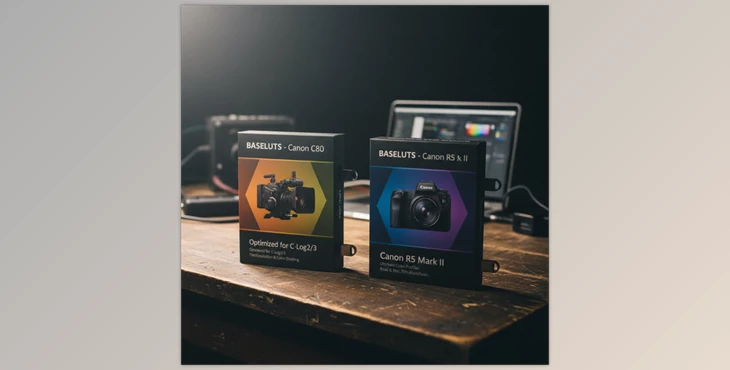
BaseLUTs for Canon C80 and R5 Mark II: Ready-Made Canon LUTs
Now that we understand how time-consuming and hard it was without LUTs, let’s see how BaseLUTs for Canon C80 and R5 Mark II make everything easier. With this product, you no longer need to spend hours adjusting color and lighting or worry about losing details.
The main features of these LUTs are:
Base LUTs
These are the main LUTs for editing and final output. Using a Base LUT, you can convert footage shot in Canon Log 2 or Log 3 to Rec709 or DWG.
- Rec709 → Standard for monitor and TV display
- DWG → For professional editing in software like DaVinci Resolve, preserving more colors and details
Monitor LUTs
These LUTs are for monitoring footage while filming. When Log footage is flat and desaturated, a Monitor LUT makes it look natural on the monitor without altering the original file. This way, you can easily check lighting, color, and scene composition while filming.
In short, BaseLUTs for Canon C80 and R5 Mark II act as a professional shortcut for color grading and image consistency: you see a realistic image while filming, edit easily afterward, and end up with footage ready for professional projects or final delivery.
Pro Tips for Using LUTs Effectively
Using BaseLUTs for Canon C80 and R5 Mark II with a few simple tips can make your shooting and editing experience much smoother and more professional.
- Always keep the original Log footage
Log footage contains the most complete color and brightness information. Keeping it ensures you can make further adjustments anytime. - Use Monitor LUTs only for previewing footage
These LUTs make the monitor image look natural without changing the original file. Always use Base LUTs for final editing. - Apply Base LUT to the entire clip or desired section
After applying the LUT, you can fine-tune contrast, brightness, and color to achieve the exact look you want. - Bold versions are great for dark scenes or high-impact visuals
They slightly increase contrast and color intensity, giving your footage a vibrant look without losing details. - LUTs ensure consistency with motion graphics and graphic elements
When footage starts standardized, adding graphic elements becomes easier and more precise, with no complex adjustments needed.
Following these tips ensures clear and viewable footage while filming and professional, consistent results after editing, ideal for motion graphics projects or final outputs.
Why Canon Ready-Made LUTs Are Worth It
BaseLUTs for Canon C80 and R5 Mark II speed up your workflow and increase precision. By adding Base LUTs to Log recordings, you make sure that the colors are correct and uniform. This saves time and avoids countless hours of color grading changes, which means faster edits and more professional outcomes without losing quality or image details.
Additionally, LUTs are especially useful for motion graphics and animation projects, as graphic elements match the original footage’s color and brightness more easily. Even beginners can make their films and projects look professional, appealing, and visually striking without extensive color grading or editing experience.

Files Password : gfxplugin.com OR 123456