Downloadable Files
You can download Cinematic Reality Powergrade for free from the bottom of this page.
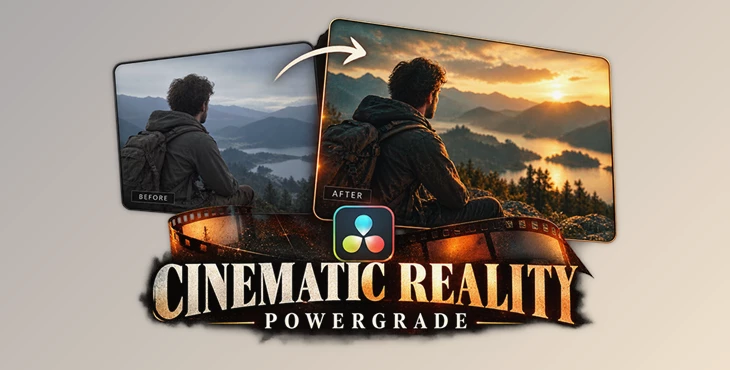
Give Your Footage a Film-Inspired Look with Cinematic Reality Powergrade
Color grading footage from different cameras can get complicated, especially when you're trying to create a consistent film look. You need to correct exposure, balance colors, adjust contrast, and then work on the creative side of the grade.
Cinematic Reality Powergrade by illkoncept gives you a ready-made color grading workflow inside DaVinci Resolve. It comes with an organized node tree that covers everything from basic corrections to film-style colors and effects.
This isn't a LUT pack with a bunch of preset looks. It's a grading setup that you can change to suit your footage. You can adjust the colors, build your own look, and decide how much of the film effect you want to use.
The entire setup uses DaVinci Resolve's built-in tools, without needing any third-party plugins.
How Cinematic Reality Powergrade Works
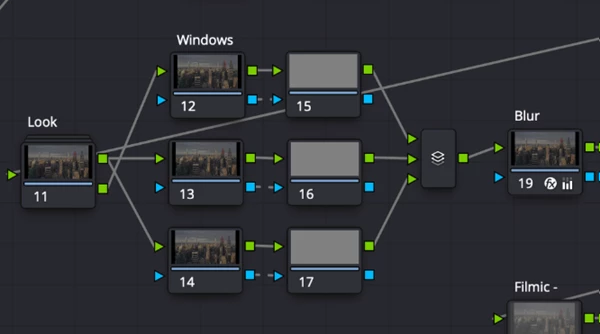
The Powergrade is built around a node tree that takes you through the grading process from left to right.
It starts with camera conversion and basic corrections, then moves into contrast, saturation, and creative color adjustments. The final stages handle film effects and print emulation.
Each part has its own nodes, so you don't have to dig through a complicated setup to find what you want to change.
You can also leave certain effects out if they don't fit your footage. The idea is to give you a starting point without forcing every project to have the same look.
Color Correction and Look Building
Before working on the film look, Cinematic Reality Powergrade gives you the tools to get your footage into shape.
You can correct exposure using HDR controls, adjust white balance in linear space, and work on contrast and tonal balance.
Once the basic corrections are done, you can start working on the colors.
The Powergrade has separate controls for film-style saturation and color density, along with nodes for adjusting individual colors. You can use these to create warmer tones, change the overall color balance, or develop a completely different look.
There are also dedicated look-building nodes, so your creative adjustments stay separate from the technical corrections.
Other tools in the node tree include:
Noise Reduction: Helps clean up unwanted noise in footage.
Dust Spot Removal: A fix node for removing small visible spots.
Parallel Masking Nodes: Let you make adjustments to selected areas of the image.
Final Sharpening: Gives you control over sharpening near the end of the grade.
Adding Film Effects to Your Footage
One of the main reasons to use Cinematic Reality Powergrade is its collection of film-inspired effects.
You can add halation, bloom, and grain to give digital footage some of the characteristics of traditional film.
Halation creates a glow around bright highlights, while Bloom softens and spreads light in brighter areas. They work differently, and you can adjust them separately depending on the result you're after.
Film Grain adds texture to the image. You can keep it subtle or make it more noticeable if you want a stronger film look.
There's also a vignette control for darkening the edges of the frame.
None of these effects has to be part of every grade. You can use the ones that suit your footage and leave the others out.
Kodak 2383 Film Print Emulation
The Powergrade finishes with a Kodak 2383 film print emulation.
This is the part of the workflow that gives your grade its film-inspired print finish.
The important thing is that you still have control over the image before it reaches this stage. You can make your own color and contrast adjustments, then use the print emulation as the finishing part of the look.
Working with Different Camera Footage
Cinematic Reality Powergrade comes with grading setups for a wide range of camera profiles.
These include Sony S-Log2 and S-Log3, Canon C-Log3, ARRI LogC3, Blackmagic Film Gen 5, RED Log3G10, Nikon N-Log, and Panasonic V-Log.
It also covers Fujifilm F-Log profiles, DJI D-Log and D-Log M, Apple Log, Insta360 I-Log, and several other formats.
You aren't limited to log footage either. The Powergrade includes options for standard Rec.709 video, phone HDR footage, and motion picture film scans.
Custom CST for Other Cameras
If your camera isn't included in the available setups, you can use the Custom CST Powergrade.
CST stands for Color Space Transform. It lets you enter your camera's color space and gamma manually, so the footage can be converted before you start grading.
This option also works with 8-bit and 10-bit footage.
It's a useful part of the package because you don't need a separate Powergrade for every camera you work with.

Learn to Use the Node Tree
The package includes a detailed video tutorial that goes through the grading workflow step by step.
It explains what the nodes do, how to adjust them, and how to work with footage from different cameras.
The tutorial covers log video, 8-bit footage, phone recordings, DJI D-Log M, film scans, and footage that needs extra correction.
It also goes through DaVinci Resolve settings and export and compression settings for YouTube.
There's a node cheat sheet as well, which you can use when you need a quick reminder of what a particular part of the setup does.
A Flexible Starting Point for Color Grading
Cinematic Reality Powergrade is a good fit for editors who want a film-inspired look but don't want to rely on a fixed LUT.
You get a grading structure that's already organized, with separate controls for corrections, creative colors, and film effects.
You can follow the workflow as it is or change individual parts to suit the footage you're working on. That flexibility is what makes it more than just another preset look for DaVinci Resolve.

Files Password : gfxplugin.com OR 123456