Downloadable Files
You can download KeyMaster for free from the bottom of this page.
Faster Keyframe Selection and Retiming in After Effects
Working with keyframes in After Effects can get frustrating when your composition has dozens of animated layers. You open properties, scroll through the timeline, select keyframes one by one, and sometimes realize you've missed a few. Things get even more complicated when some layers are locked or hidden.
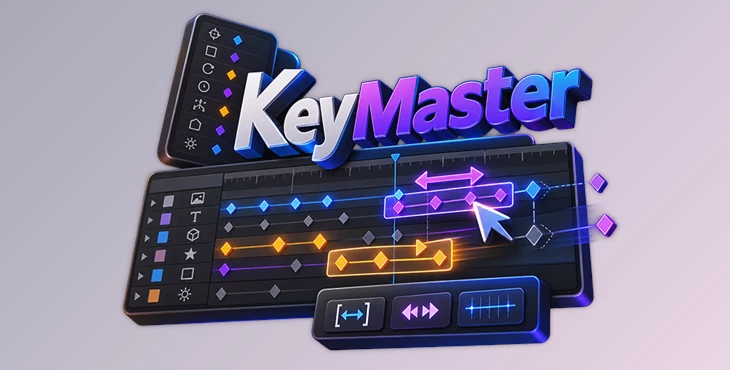
KeyMaster is an After Effects tool designed to simplify this process. It helps you find, select, move, and retime keyframes across multiple layers without having to handle each one individually.
Find and Select Keyframes Without Searching Through Layers
One of the most practical features of KeyMaster is its ability to locate animated layers throughout your composition.
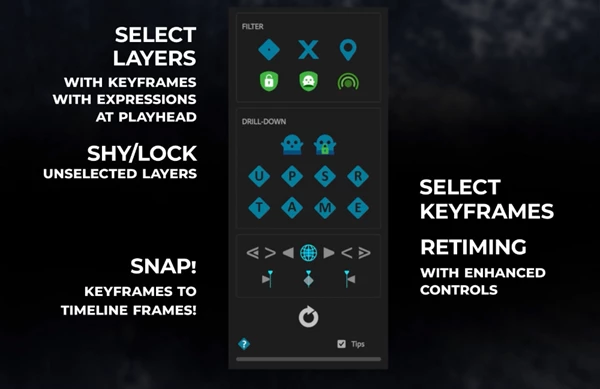
Rather than opening every layer to find its keyframes, you can use three filters to select:
Layers with Keyframes: Find layers containing animated properties.
Layers with Expressions: Identify layers that use expressions.
Layers Live at the Playhead: Focus on layers active at the current timeline position.
KeyMaster also works with locked and shy layers. It can automatically unlock and unshy them during filtering, helping you find keyframes that might otherwise remain hidden.
Once you've selected the layers you need, you can shy or lock everything outside your selection. This keeps your timeline focused on the animation you're editing.
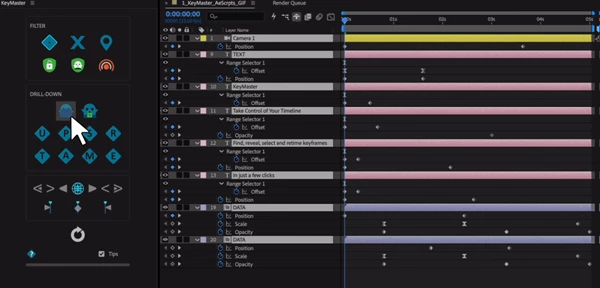
Select Specific Keyframes Across Multiple Layers
Selecting keyframes by property is where KeyMaster becomes particularly convenient.
Suppose you're working with 20 animated layers and only want to adjust their Position keyframes. Normally, you'd need to reveal those properties and select the relevant keys.
With KeyMaster, you can select all Position keyframes across your selected layers with a single click.
You can also combine different property selections without starting over.
The panel supports:
Property | Selection |
|---|---|
Position (P) | All Position keyframes |
Scale (S) | All Scale keyframes |
Rotation (R) | All Rotation keyframes |
Opacity (T) | All Opacity keyframes |
Anchor (A) | All Anchor Point keyframes |
Masks (M) | Mask-related keyframes |
Effects (E) | Effect keyframes |
U | All keyframes |
For instance, you could select Position and Scale keyframes together while leaving Rotation and Opacity untouched.
This level of control is especially helpful when several layers share similar animations, but you only need to change specific properties.
Move and Retime Your Animation More Precisely
Selecting keyframes is only part of the job. KeyMaster also provides controls for adjusting their timing.
You can move selected keyframes or proportionally expand and compress their timing without manually dragging individual keys.
There are two retiming approaches:
Global Retiming
Adjusts timing proportionally using the overall span of all selected keyframes. This is useful when you want to stretch or tighten an entire animation while maintaining the relative timing between different properties.
Per-Property Retiming
Uses the individual span of each property when calculating timing changes. This gives you more control when different animated properties have their own timing ranges.
Keep Keyframes Aligned to Whole Frames
When you stretch keyframes using Alt-dragging in After Effects, some can end up between whole timeline frames.
KeyMaster includes a one-click snapping function that moves selected keyframes back onto whole frames.
This works with keyframes retimed through KeyMaster and those adjusted using After Effects' Alt-drag method.
Handle Keyframes Outside the Timeline
Another useful feature addresses a problem that can happen during retiming.
When you stretch an animation, some keyframes may move beyond the beginning or end of your composition. Because they're outside the visible timeline, they can be difficult to notice.
KeyMaster provides visual feedback when these out-of-bounds keyframes exist.
You can then remove them with a single click.
Rather than simply deleting the keys and potentially changing the animation, KeyMaster replaces them with boundary keyframes containing the appropriate values.
This preserves the animation's behavior within the composition while removing unnecessary keyframes outside its boundaries.
A Dockable Panel That Fits Your Workflow
KeyMaster runs as a resizable, dockable panel inside After Effects, so you can keep its controls accessible while working on your timeline.
Its workflow is straightforward:
Filter Layers
Select Properties
Move or Retime
Find the relevant layers, isolate their keyframes, and adjust their timing.
You don't need to constantly switch between manually expanding properties and selecting individual keys.
For motion designers working with complex compositions, especially animations involving many layers and different properties, this can significantly reduce repetitive timeline work.
Is KeyMaster Worth Using?
KeyMaster focuses on a specific part of the After Effects workflow: managing existing keyframes more efficiently.
It doesn't replace After Effects' animation tools or create animations for you. Instead, it gives you faster access to the keyframes you've already created and more convenient ways to adjust their timing.
If your projects frequently involve large numbers of animated layers, KeyMaster can help keep your timeline organized and make keyframe editing considerably less tedious.

Files Password : gfxplugin.com OR 123456