Downloadable Files
You can download Local Narrator TTS for free from the end of this product page.
Local Narrator TTS
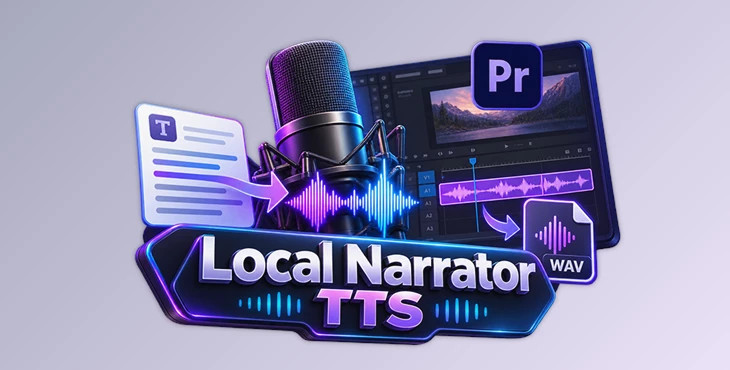
Local Narrator TTS brings local text-to-speech generation directly into Adobe Premiere Pro. It uses a reference WAV together with an exact transcript of that recording to generate new narration, then inserts the resulting WAV directly into the Premiere Pro timeline.
The workflow is simple: write your text, generate the audio on your Mac or Windows PC, and add it to an audio track in your edit. You can then hear right away how it works with the video. This is useful for adding temporary narration to a tutorial, testing dialogue with your edit, or changing the wording before recording the final audio.
Speech synthesis runs locally rather than through a cloud TTS service, although an internet connection is still required for installation, model downloads, and aescripts license activation and validation.
Reference-Based Local Narration
Local Narrator TTS generates speech using a reference voice. The reference consists of two matching elements:
A clean reference WAV
The exact transcript of everything spoken in that WAV
We recommend a reference recording of at least six seconds. If you trim the audio, the transcript should include only the words in the trimmed version. The transcript is not a summary and should not contain the new narration you want to generate.
The reference voice and generated narration must also use the same language. For English narration, for instance, the tool requires an English reference WAV with its exact English transcript.
Changing only the language setting does not make a reference recorded in another language suitable for English generation. Japanese/English mismatches are blocked, while the reference-language hint relies on the supplied transcript and does not independently verify the language or words contained in the WAV.
Generated speech quality can vary between references and takes. Pronunciation, pacing, and similarity to the reference are not guaranteed to be identical every time.
Generate and Insert Audio Without Leaving Premiere Pro
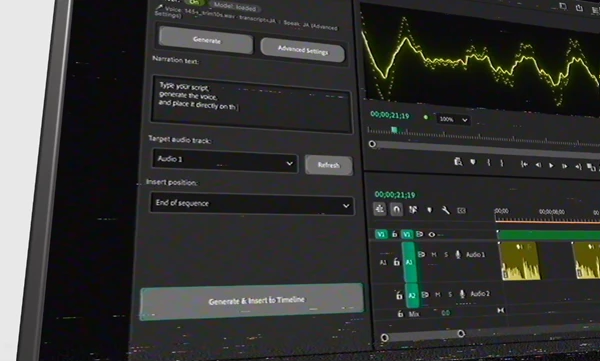
The Premiere UXP panel combines narration generation and timeline placement in one workflow:
Reference WAV + Exact Transcript → Narration Text → Generate WAV → Insert into Timeline → Review in Context
After entering a short narration line, you can select the destination audio track and determine where the generated clip should appear. Local Narrator TTS supports three insertion positions:
At the playhead
At a specified time in seconds
At the end of the sequence
Clicking Generate & Insert to Timeline creates the WAV and places it into the selected track. The resulting files remain available for later editing and reuse.
By default, generated WAV files can be stored in an output folder beside the Premiere project, or you can choose another folder.
This workflow is particularly relevant when narration is still being developed. A line can be generated, played against the edit, rewritten, and generated again without first producing a final external voice recording.
What Is Included
Local Narrator TTS includes a Premiere UXP panel with both English and Japanese interface options. The package provides:
Local Qwen3-TTS engine setup for macOS and Windows
Reference voice and transcript controls
WAV generation
Direct insertion into a selected Premiere Pro audio track
Configurable output folder
In-panel local engine setup
Optional Irodori-TTS setup
The interface language and spoken language are separate settings. Changing the interface simply changes the panel labels; it does not determine the appropriate language for the reference voice.
The current UXP release processes one clip at a time. Batch generation and multi-take variation are not included.
Setup and First Generation
Local Narrator TTS requires initial local setup before it can generate narration.
First, extract the downloaded package and follow the included Install/Quickstart PDF. You can install and license the plugin through the aescripts + aeplugins manager or install it using the ZXP/UXP Installer.
Open the panel in Premiere Pro and check the server status. If it shows Server: Off, select Set up local engine and allow Premiere access if prompted. Once setup is complete, the status should change to Server: On. The engine is registered to start at login.
After fully quitting and reopening Premiere Pro, open:
Window → Plugins → Local Narrator TTS
Activate the license, save the Premiere project, and open the sequence where you'll insert the narration.
In Advanced Settings, choose the reference WAV and enter its exact transcript. Then set Language to speak so that it matches both the reference and the new narration.
Return to the Generate section, type a short line, select the target track and insertion point, and choose Generate & Insert to Timeline.
The first generation can take longer because the model must be loaded. Once generation finishes, the new clip can be played directly from the Premiere timeline.
System and Compatibility Requirements
Local Narrator TTS is designed for Premiere Pro 25.6 or later on macOS and Windows and has been demonstrated and tested with Premiere Pro 2026.
The local engine setup requires:
Python 3.10–3.12
FFmpeg available on PATH
Several GB of free storage
Internet access during installation and model downloads
Internet access for aescripts license activation and validation
A saved Premiere project with an open sequence before generation
The local speech engine, Python packages, and downloaded models may use several gigabytes.
Once installed, speech synthesis itself runs on the computer, so there are no cloud TTS per-generation charges. Generation still requires an active aescripts license or an active trial when one is available.
Local Generation and File Management
A key distinction of Local Narrator TTS is that actual speech generation happens on the user's machine. The generated narration does not depend on a cloud TTS request for each line.
This local setup also means that the engine and its downloaded models remain installed separately from the Premiere plugin. On macOS, these files are stored under:
~/Library/Application Support/LocalNarratorTTS
On Windows:
%LOCALAPPDATA%\LocalNarratorTTS
Removing the plugin through Creative Cloud Desktop's Manage plugins does not automatically remove these engine files and downloaded models.
When updating, you can install the new CCX with the manager or ZXP/UXP Installer before reopening Premiere. If an older panel keeps loading, remove it through Manage plugins, then install the new CCX and restart Premiere. The local engine can then be set up again from the panel if an engine update is required.
Where Local Narrator TTS Fits in an Editing Workflow
Local Narrator TTS is built for situations where narration needs to be evaluated as part of the Premiere edit rather than treated as a completely separate production step.
A tutorial editor can create a rough voice track while arranging the sequence. An editor can test whether a sentence fits the available timing before a later recording session. Wording can also be revised and regenerated after hearing the line against the picture.
Review the generated audio before final use. Output quality depends on the reference recording and individual generation, and pronunciation, pacing, or voice similarity can vary between takes.
With its reference-based voice generation, local processing, WAV output, and direct Premiere Pro timeline insertion, Local Narrator TTS keeps narration drafting closely connected to the edit while leaving the generated audio available as normal WAV files for further editing and reuse.

Files Password : gfxplugin.com OR 123456