Downloadable Files
You can download Again! for free from the end of this page.
Repeat Animations at New Starting Values in After Effects
Repeating an animation in After Effects sounds simple. If the starting and ending values are exactly the same, you can usually copy and paste the keyframes and move on. But things become more complicated when you want to repeat the same motion from a completely different position, scale, or value.
That is exactly where Again! becomes useful.
Instead of simply copying the original keyframe values, Again! focuses on the motion between those keyframes. This means you can reuse an animation while allowing the current value of your layer to become the new starting or ending point.
It is a simple idea, but it can make repetitive animation work much faster and more flexible.
What Does Again! Do?
Again! is an After Effects tool that repeats the motion of selected keyframes at new starting values.
Normally, copying keyframes also copies their exact values. For example, if an object moves from one specific position to another, pasting those keyframes somewhere else repeats those same position values.
Again! works differently.
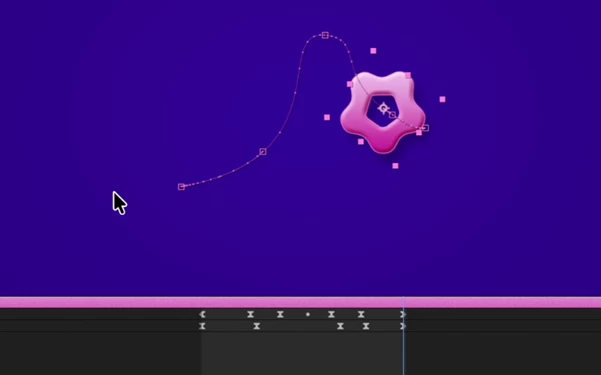
It looks at how the selected keyframes change and applies that motion relative to the layer's current value. As a result, you can reuse the same movement without forcing the layer back to its original starting point.
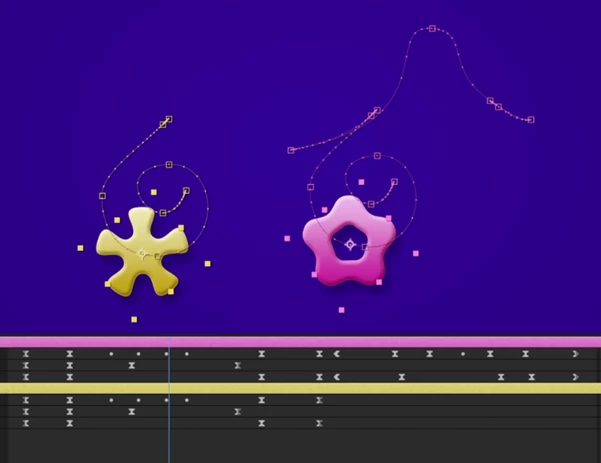
Imagine that you have animated a gear moving and rotating. Later in the timeline, the gear is already somewhere else, but you want it to repeat the same movement. Instead of manually recreating or adjusting the keyframes, Again! can apply the original motion from the gear's new position.
This makes repeated animation easier to control while keeping the timeline flexible.
Repeat Motion Forward or Backward
One useful part of Again! is that the playhead determines how it applies the selected animation.
If the playhead is positioned after the selected keyframes, the repeated animation begins at the playhead.
If the playhead is positioned before the selected keyframes, the animation ends at the playhead.
This gives you a convenient way to reuse motion in either direction without manually rebuilding the animation around a new point in time.
For motion designers working with several animation sections on the same layer, this can save a surprising amount of keyframe editing.
Repeat Animations from New Values
The main feature of Again! is its ability to repeat motion rather than simply duplicate values.
Your layer's current value can become the new starting or ending point of the animation. This is particularly useful for properties such as position and scale when an element has already changed earlier in the timeline.
Repeat Only the Animation You Need
Again! doesn't force you to repeat an entire animation continuously.
You can select a specific portion of your keyframes and apply only that section somewhere else in the timeline. Other animations can still happen on the same layer before, after, or between these repeated movements.
This provides more control than relying entirely on a continuous loopOut("offset") expression when you only need a particular movement to happen again at selected moments.
Transfer Motion Between Layers
Again! can also help when you want to use the motion from one layer on another layer.
The workflow is straightforward:
Copy the keyframes containing the animation you want to reuse.
Select the layer that should receive the motion.
Move the playhead to where you want the new animation to start.
Run Again!
The motion is then applied based on the values of the new layer.
This can be useful when several elements in a composition need similar movement but do not share the same original position or values.
For example, you might create a movement for one graphic element and then reuse that movement on several other objects positioned around the composition.
Two Ways to Repeat Scale Animations
Scale animations need special attention because the same change can be interpreted in different ways. Again! provides two methods: Amount and Proportion.
Scale by Amount
Suppose your original scale animation goes from 50% to 100%.
That is an increase of 50 percentage points.
When repeating by amount, Again! applies that same difference. Moving forward from 100%, the next animation would therefore go from 100% to 150%.
Applied backward, the corresponding range would be 0% to 50%.
Scale by Proportion
The same 50% to 100% animation can also be viewed as doubling the size.
When using proportional scaling, that relationship is preserved instead of the numerical difference.
So moving forward from 100% results in 100% to 200%, while moving backward gives 25% to 50%.
Having both options makes Again! useful for different types of animation. Sometimes you want a consistent numerical change, while other times preserving the relative scale relationship produces a more natural result.
Use Again! as a Panel or Hotkey
Again! can fit into different After Effects workflows.
If you prefer having tools visible in your workspace, you can use its dockable ScriptUI panel. The panel includes a button to run Again! and lets you choose whether to apply scale by amount or proportion.
If you prefer keyboard-driven workflows, the package also includes Again-Hotkey!, a headless JSXBIN file you can assign to a hotkey or use with KBar.
This can make repeated animation adjustments especially quick when you are working through a large composition and don't want to keep reaching for a panel.
Why Is Again! Different from Simply Copying Keyframes?
Copying and pasting keyframes works perfectly when you actually want the same values.
The problem appears when you want the same movement but different values.
Again! separates those two ideas.
Instead of thinking, "repeat these exact numbers," you can think, "repeat what this animation did."
That difference is useful in projects containing repeated entrances, object movements, scaling sequences, interface-style animations, mechanical movements, and other situations where similar motion needs to happen from different positions or states.
Tips for Using Again! More Effectively
Select Only the Motion You Actually Need
You do not always need to reuse the entire animation. Select the specific keyframes that represent the movement you want to repeat.
Keeping your selections focused can make complex timelines easier to manage and gives you more control over where individual animation sections appear.
Pay Attention to the Playhead
Remember that the position of the playhead matters.
Place it after the selected keyframes when you want the repeated animation to start there, or before them when you want the animation to finish at that point.
Getting into this habit can make the workflow feel much more intuitive.
Choose the Right Scale Mode
Do not automatically use the same scale method for every project.
Use Amount when you want a consistent numerical difference. Use Proportion when maintaining the relative size change is more important.
Try both when you are unsure. The better choice depends on how the object is supposed to behave visually.
Build Reusable Motion
Again! becomes especially useful when you start thinking of keyframes as reusable pieces of motion.
A movement created for one object does not necessarily have to stay attached to that object's original values. You can copy its keyframes and apply the motion to another layer at another point in the timeline.
This can help keep related movements consistent throughout a project without requiring every animation to be built from scratch.
A More Flexible Way to Reuse Keyframes
Again! addresses a specific but common After Effects problem: repeating an animation when the new starting values differ from the original ones.
By applying the motion of selected keyframes instead of simply duplicating their values, it gives you more freedom to reuse animation throughout a composition.
You can repeat selected sections forward or backward in time, transfer motion between layers, choose between amount-based and proportional scale changes, and run the tool from either a dockable panel or a hotkey.
If you’re using the same type of movement on different objects or values, these tools can save you from editing the same keyframes again and again. This means less repetitive work and an easier animation workflow.

Files Password : gfxplugin.com OR 123456