Downloadable Files
You can download Aurora Presets for free from the end of this page.
Give Your Photos a Finished Look in Just a Few Clicks
Editing a great photo does not always need to involve dozens of adjustments. Sometimes, the biggest improvement comes from having a strong starting point—one that already handles exposure, color, mood, and texture in a balanced way.
Aurora Presets is a Lightroom preset pack designed to make that starting point much easier to achieve. Instead of building a look from scratch for every photograph, you can apply a preset and quickly move your image much closer to a finished result.
The pack combines traditional Lightroom presets with custom color profiles and dedicated grain options. This makes it useful not only for speeding up editing, but also for creating more distinctive color and texture across a collection of photographs.
What Are Aurora Presets?
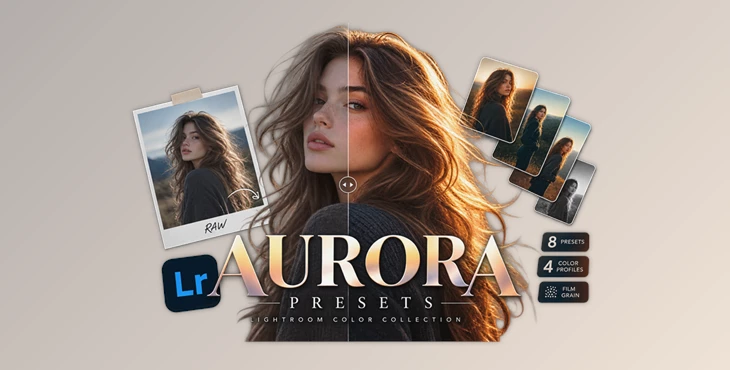
Aurora Presets is a collection of presets and custom color profiles created for Lightroom Classic and Lightroom CC. The package contains a total of 8 presets and 4 custom color profiles.
Five of the included presets focus on enhancing exposure and color, while the remaining three are specifically designed for adding grain.
This combination creates a flexible editing workflow. For example, you can begin with a color and exposure preset to establish the overall appearance of an image, then use one of the grain options when you want to introduce additional texture and a more organic photographic character.
The custom color profiles are another important part of the package. They were created to push the appearance of images beyond what can be achieved through standard Lightroom adjustments alone, giving photographers additional possibilities when developing their final color.
Why a Strong Starting Point Matters
One of the most time-consuming parts of photo editing is repeating similar adjustments across multiple images. Exposure, color balance, contrast, and overall mood often require attention before you can move on to smaller refinements.
A well-designed preset gives you a more developed starting point.
The creator of Aurora Presets designed the pack around this workflow, noting that applying a preset can bring an image approximately 90–95% of the way toward completion in their own editing process. From there, the remaining work will typically involve relatively simple adjustments such as exposure and white balance.
Imagine editing an entire portrait session or travel collection. Rather than manually recreating your preferred color treatment for every photograph, you can establish the look quickly and then concentrate on the small adjustments that make each image work individually.
Features
8 Lightroom Presets
The package includes eight presets in total, providing a compact selection rather than an overwhelming library of nearly identical looks.
This makes it easier to experiment and quickly identify the treatment that works best for a particular photograph.
5 Exposure & Color Presets
Five presets are focused on enhancing the exposure and color of your photographs.
They can provide the foundation of your edit, helping you move from a relatively neutral starting image toward a more developed and intentional look without manually building every adjustment.
3 Grain Presets
Three dedicated grain presets are also included.
Grain can be especially useful when a perfectly clean digital photograph feels a little too sterile. Applied carefully, it can introduce subtle texture and help give an image a more tactile and organic appearance.
The key is moderation. Grain should complement the photograph rather than become the first thing the viewer notices.
4 Custom Color Profiles
Alongside the presets, Aurora Presets contains four custom color profiles.
These profiles are designed to provide additional ways of shaping color beyond standard Lightroom adjustments. This is particularly useful when you want the overall palette of your photographs to have a more distinctive character before making your final corrections.
Lightroom Classic & Lightroom CC Compatibility
The pack works with both Lightroom Classic and Lightroom CC, making it suitable for photographers using either of Adobe’s popular Lightroom workflows.
A Faster Editing Workflow
Speed is one of the main ideas behind the pack.
Instead of treating a preset as the final edit, you can use it as an advanced starting point. Apply the look first, then make smaller corrections according to the individual photograph.
This approach is particularly convenient when working with a large number of images that need to maintain a consistent visual style.
Where Can Aurora Presets Be Useful?
The presets can fit naturally into many common photography workflows.
For portraits, you might use an exposure and color preset to establish the overall atmosphere before correcting white balance for natural-looking skin. For lifestyle or travel photography, the presets can help maintain consistent colors across photographs captured under slightly different lighting conditions.
Grain presets can also work well when you’re aiming for a more textured or film-inspired finish, while the custom profiles provide another creative layer for photographers who want to explore color beyond basic Lightroom adjustments.
The important point is that the preset does not have to replace your own editing decisions. Instead, it handles much of the initial work so you can spend more time refining the details that matter.

Tips for Getting Better Results
Start with a properly exposed image whenever possible. Although the presets can enhance exposure and color, beginning with a strong source photograph gives you more flexibility and generally produces cleaner results.
After applying your preferred preset, check exposure and white balance first. These are often the two adjustments that need the most attention because every photograph is captured under different lighting conditions.
You should also avoid assuming that the same preset intensity will be perfect for every image. Pay attention to skin tones, highlights, shadows, and the overall color balance, then fine-tune the photograph until the treatment feels natural.
When using grain, view the image at different zoom levels. A grain effect that looks subtle while zoomed out may become much stronger at full resolution. The goal is usually to introduce texture without sacrificing important detail.
Finally, when editing a complete photo series, try applying a similar base look across the collection before making individual corrections. This can make it considerably easier to maintain visual consistency from one photograph to the next.
A Simple Way to Build a More Efficient Lightroom Workflow
Aurora Presets combines eight Lightroom presets with four custom color profiles to create a straightforward editing toolkit for Lightroom Classic and Lightroom CC.
With five presets dedicated to exposure and color, three options for grain, and four additional color profiles, the pack covers both the technical starting point of an edit and some of its more creative finishing touches.
Its biggest advantage is workflow efficiency. Instead of repeatedly building similar adjustments from scratch, you can quickly establish a look and spend the rest of your editing time refining exposure, white balance, and the individual details of each photograph.

Files Password : gfxplugin.com OR 123456