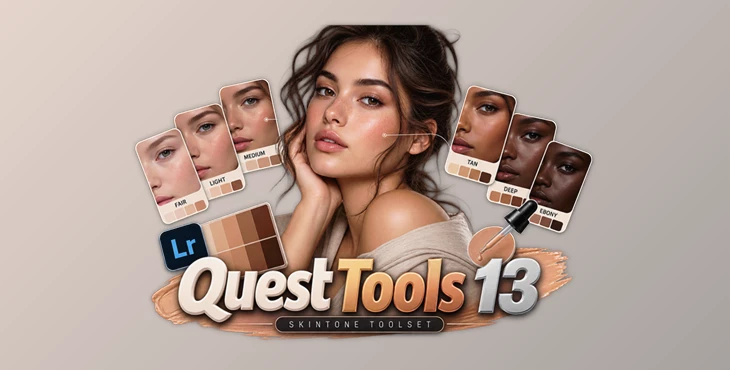
Downloadable Files
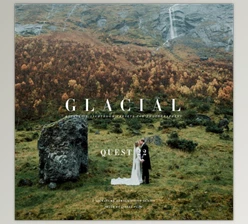
You can download Quest Tools 13 for free from the end of this page.
Bring Skin Back Into Balance
Skin can be one of the most challenging parts of an image to get right. A portrait may have great lighting, strong composition, and beautiful color, yet the skin can still feel slightly washed out, too red, uneven, or disconnected from the rest of the image.
That is where Quest Tools 13 comes in. This dedicated skin tone toolset is designed to bring skin back into balance while preserving the natural character of the person in the photograph. Instead of forcing every complexion toward the same look, it works across a broad range of human skin tones, from fair to ebony.
The idea is simple: create skin that looks consistent, rich, polished, and believable — not artificially filtered.
What Does Quest Tools 13 Do?
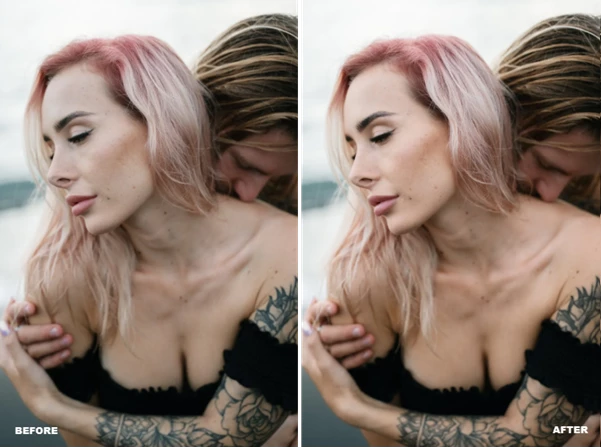
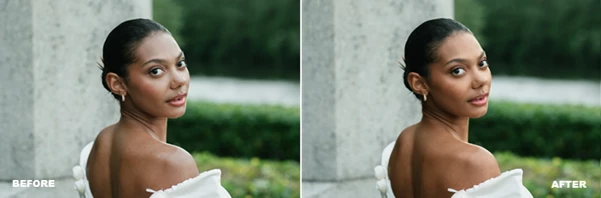
Quest Tools 13 helps to deal with common skin tone issues that may be present in portraits. Ashen skin, skin that lacks any richness to the complexion, color casts, and ruddy patches can all be dealt with using this toolset.
Quest Tools 13 is not a one-stop tool to fix all skin issues. Rather, it allows artists to find a starting point for their skin tone editing, to make corrections to their image, and then to finish their edit to create an overall cohesive look and feel.
For instance, an artist might encounter a problem where an individual’s complexion is quite pale. In another example, the individual might have patches of red on their cheeks. In the third example, the complexion might lack any richness to it. Each of these issues can be dealt with using Quest Tools 13, allowing artists to correct common skin tone problems in a portrait shoot.
More control over the skin can be seen while maintaining the original look and color of the person’s complexion.
Why Balanced Skin Makes a Difference
Skin attracts attention immediately, especially in portraits, beauty photography, fashion work, and close-up imagery. Even subtle inconsistencies can therefore affect how polished the entire photograph feels.
Balanced skin does not necessarily mean perfectly uniform skin. Natural variation is important. The goal is to reduce distracting color or tonal inconsistencies without removing the qualities that make real skin look real.
This is particularly useful when lighting conditions introduce unwanted casts or when different areas of the face respond differently to the available light. Correcting those issues can make the subject feel more naturally integrated into the scene and give the final image a cleaner, more intentional appearance.
Meet Quest Tools 13
Instead of behaving like a simple filter, Quest Tools 13 is structured more like a compact skin-retouching workflow.
The toolset is built in layers, allowing you to decide how broadly or precisely you want to work depending on the image. You can begin with a complexion-matched enhancement, fine-tune the result with modifiers, and finish with softening when the photograph needs additional polish.
This layered approach is especially useful because not every portrait requires the same amount of correction. Some images may only need a subtle baseline adjustment, while others can benefit from several targeted refinements.
Features
6 Tone-Matched Enhancement Presets
The workflow begins with six tone-matched enhancement presets covering different complexion ranges.
These presets are designed to establish a clean and even baseline before more detailed adjustments are made. Choosing an enhancement that closely matches the subject’s complexion gives you a more relevant starting point than applying the same treatment to every portrait.
This can be particularly helpful when working through a portrait session containing multiple subjects or when editing images with noticeably different skin tones.
8 Fine-Tuning Modifiers
After establishing the initial balance, eight modifiers provide additional control over the skin.
They can be used to introduce warmth, neutralize unwanted casts, or make more targeted corrections. This makes the workflow flexible: you do not have to accept the initial enhancement as the finished result.
For example, if the overall complexion looks good but still feels slightly cool or ashen, you can refine that specific issue instead of rebuilding the entire correction. Likewise, localized redness or an unwanted cast can be addressed more deliberately.
3 Softening Presets
The final stage includes three softening presets designed to give skin a more polished and refined finish.
Softening works best when it supports the existing correction rather than becoming the main effect. Used carefully, it can help the final portrait feel cleaner while maintaining a believable appearance.
Having multiple softening options also gives you room to choose a finish appropriate to the photograph rather than relying on one fixed treatment.
A Layered Retouching Workflow
One of the most useful aspects of Quest Tools 13 is the way these components work together.
The six enhancement presets create the foundation, the eight modifiers handle refinement, and the three softening presets provide the finishing stage. This turns the collection into a step-by-step system rather than a group of unrelated effects.
You can keep the process simple for an image that already has good skin tones or work more precisely when a portrait needs additional correction.
Where Quest Tools 13 Can Be Useful
Quest Tools 13 can be used in a variety of different photographic editing workflows, from retouching portraits for magazine features to fashion and advertising campaigns, to providing a simple retouching routine for lifestyle portraits.
It can also be useful for close-up portraits to enhance the visibility of skin color variations. This feature is helpful for establishing consistency between a series of portraits. The main advantage of these enhancement options is their adaptability to individual portraits.
Unlike enhancing all the portraits to the same skin look, each portrait can be enhanced according to its specific requirements.
Tips for More Natural Results
Choose a skin tone enhancement that best suits the portrait subject. Select an enhancement option that naturally improves the portrait subject’s complexion without losing its original look.
After that, use the modifiers only where they are needed. If the skin needs to be warmer, adjust that particular modifier. If there is a cast or ruddy area on the subject, focus on that aspect of the image rather than applying all of the available modifiers.
Pay attention to the remainder of the image as well. The skin should look and breathe within the lighting of the image. If the skin is neutral and the lighting is warm or cool, it may look unnatural.
Finally, use the softening feature as the last finishing step. It is usually more convincing to have the skin look subtly refined than to remove all of the natural texture of the skin.
A More Controlled Way to Refine Skin
Quest Tools 13 gives photographers a more controlled way of dealing with one of the most sensitive areas of retouching: skin tones.
This tool offers six tone-matched enhancement presets, eight modifiers, and three softening presets to photographers who want to give their subject’s skin a refined look from start to finish (or just a little bit of a refinement as needed).
All photographers who regularly struggle with washed-out tones in their subject’s skin can benefit from this tool to even out their subject’s skin tones in a more controlled manner.

Files Password : gfxplugin.com OR 123456