Downloadable Files
You can download Skew Pro for free from the end of this page.
Take Control of Your Timeline
Working with layers and keyframes in After Effects often means spending a lot of time manually adjusting timing. When an animation contains many elements, even a simple timing experiment can require moving dozens of keyframes or layers individually.
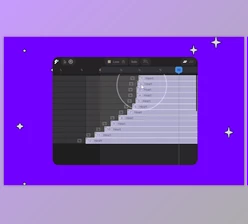
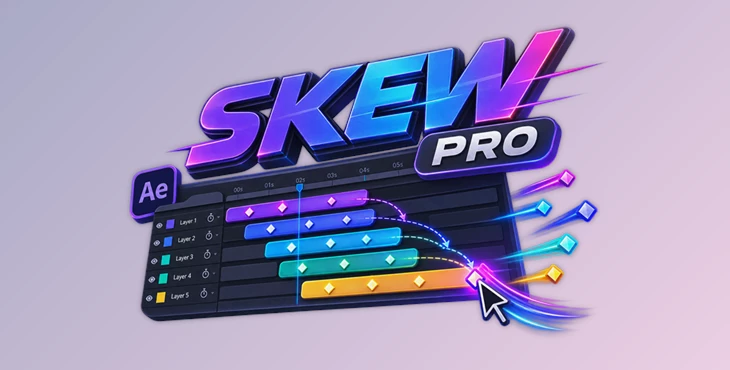
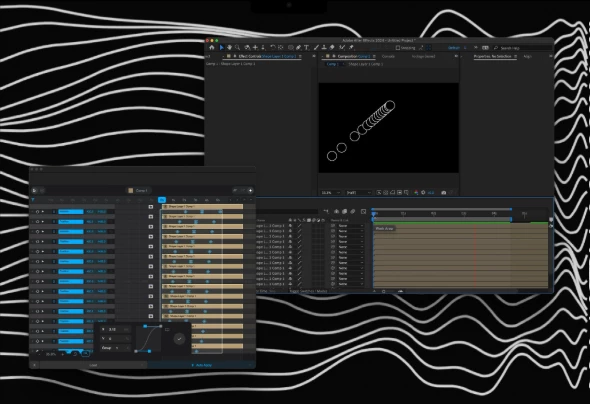
Skew Pro introduces a more visual and intuitive approach to this process. Instead of relying only on the standard After Effects timeline, it provides its own futuristic timeline experience where you can offset, reshape, flip, and manipulate groups of layers and keyframes using simple mouse gestures.
The idea is straightforward: spend less time managing the timeline and more time experimenting with how your animation actually feels.
What Does Skew Pro Do?
Skew Pro is a timeline manipulation tool designed for Adobe After Effects. With a single click, your selected layers and keyframes appear inside the Skew Pro interface, where their timing can be manipulated visually.
Changes made inside Skew Pro stay synchronized with the After Effects timeline. This means that when you drag, skew, liquify, or flip elements, the timing changes are immediately reflected in your composition.
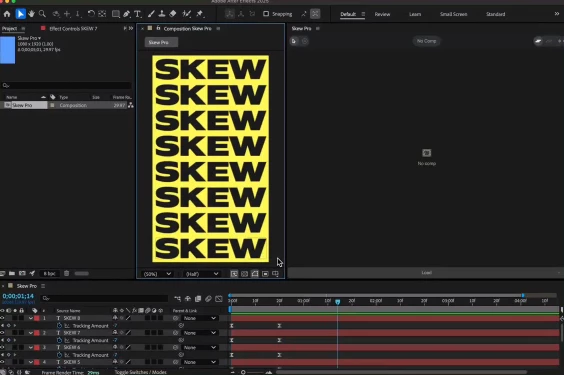
For example, imagine you have several text layers appearing at exactly the same moment. Instead of manually offsetting each layer, you can use Skew Pro to drag across them and quickly create a staggered sequence.
The same approach can be applied to keyframes. A group of animations that originally happen simultaneously can be transformed into a flowing sequence with just a simple gesture.
This makes timing experimentation much faster and encourages you to try variations that might otherwise require too much manual timeline work.
Skew Pro Features
Skew Layers
Skew Layers lets you offset multiple layers with a single drag.
Dragging across the layers changes their timing, while pulling downward can create an arrow-shaped timing arrangement. This is especially useful when creating staggered animations where several objects need to enter or move one after another.
For example, a collection of titles, icons, cards, or graphic elements can be transformed from a simultaneous entrance into a progressive animation without manually repositioning every layer.
Skew Keyframes
The same concept works directly with keyframes.
Skew Keyframes allows you to offset a group of keyframes with one drag and create more interesting timing relationships between animated properties.
This can be particularly helpful for motion graphics where position, scale, rotation, or other animated properties need a cascading or sequential feel.
Liquify Layers
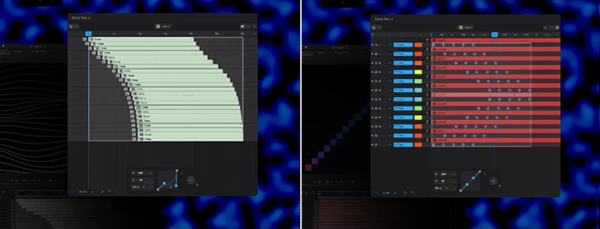
The Liquify Layers feature provides a more organic way to manipulate timing.
Instead of moving every layer separately, you can interact with groups of layers and naturally push them through time. This makes it easier to experiment with timing while maintaining relationships between nearby elements.
It can be useful when an animation feels too mechanical, and you want to introduce more natural variation into the sequence.
Liquify Keyframes
Liquify can also be applied directly to keyframes.
By touching and manipulating groups of keyframes, you can reshape their distribution across time. This provides a fast way to explore different animation rhythms without repeatedly selecting and repositioning individual keyframes.
For complex motion graphics, this can significantly reduce repetitive timeline adjustments.
Flip Layers and Keyframes
Sometimes an animation can feel completely different simply by reversing the timing relationship between its elements.
The Flip feature lets you quickly flip layers or keyframes in time. Instead of rebuilding the sequence manually, you can instantly test the opposite timing direction and see whether it produces a more interesting result.
This makes Flip particularly useful during the experimentation stage of animation.
Synchronized with After Effects
One of the most practical aspects of Skew Pro is its connection with the native After Effects timeline.
Your layers and keyframes can appear inside Skew Pro with a single click, and timing adjustments are immediately reflected in your composition. You can therefore use Skew Pro as a visual timing workspace while continuing to work normally inside After Effects.
Make Timing Part of the Creative Process
The biggest advantage of Skew Pro is not simply that it moves keyframes faster. It makes timing easier to experiment with.
Consider a logo animation containing several shapes. You might initially animate every shape at the same moment. With Skew Pro, you can quickly stagger the layers, reshape the keyframe distribution with Liquify, and then flip the sequence to compare different versions.
The same workflow can be useful for kinetic typography, UI animations, title sequences, transitions, infographic animations, and compositions containing many synchronized elements.
Instead of treating timing adjustments as repetitive technical work, you can approach them as part of the creative design process.
Tips for Better Results
When using Skew Pro, start with relatively simple timing changes before applying more dramatic manipulation. Small offsets between layers can often create a more polished animation than extremely large timing differences.
For staggered motion, pay attention to visual hierarchy. Important elements can appear first, while secondary objects follow slightly later. This creates a clearer sense of direction for the viewer.
Liquify is particularly useful for breaking up overly uniform timing. Rather than giving every element exactly the same delay, try creating subtle variations so the animation feels more organic.
It is also worth experimenting with Flip before rebuilding an animation manually. A sequence that feels ordinary in one direction may become much more dynamic when its timing order is reversed.
Finally, use Skew Pro for experimentation while still paying attention to the final rhythm inside your composition. Faster timeline editing gives you more freedom to test ideas, but the best timing ultimately depends on the visual style and purpose of your animation.
A More Flexible After Effects Timeline
Skew Pro allows After Effects users to manipulate their layers and keyframes visually. Features like Skew Layers, Skew Keyframes, Liquify Layers, Liquify Keyframes, and Flip allow users to modify the appearance of their compositions without having to adjust each layer individually.
This plugin is beneficial to anyone who works with After Effects and often has layers and keyframes in their compositions.
This tool also allows users to experiment more with their projects. Instead of having to select different parameters to adjust the movement of their layers, they can quickly and easily make adjustments with a gesture, making it less of a chore to try a new look at their composition.

Files Password : gfxplugin.com OR 123456