Why Does Skin Color Sometimes Ruin the Shot?
Have you had time to check out the Capture One Editorial Style Pack? I'm sure you've encountered it before. You take a photo, and everything is perfect—the lighting, the subject's positioning, the framing... and then that annoying little thing that ruins it all—skin color. Sometimes it's too yellow, sometimes too green, sometimes that weird red/magenta hue that you can't get rid of after spending 4 hours dodging and burning. A professional photo is made to look like a bad photo due to the wrong skin tone.
A professional photo is made to look like a bad photo due to the wrong skin tone.
A professional project is missing the balance and appeal it should have by neglecting this one factor. The good news is that with a little skin color correction and some intelligent color grading, you can go from mediocre to professional in no time at all. Once you learn how to adjust skin tones correctly and enhance the mood of your image, all your projects become faster, more beautiful, and more cohesive.
What Does Skin Color Correction and Grading Mean?
Skin color correction ensures that the skin in your photos looks real and natural, without those strange yellow, green, or red undertones that irritate the eye.
Color grading is about giving your image a specific mood; for example, a cool and calm summer vibe, a nostalgic retro style, or a chic, classic black-and-white look. Essentially, grading is like clothing for your photo—it shows off its style and atmosphere.
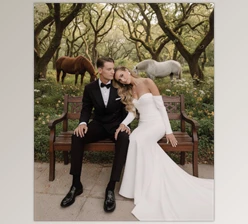
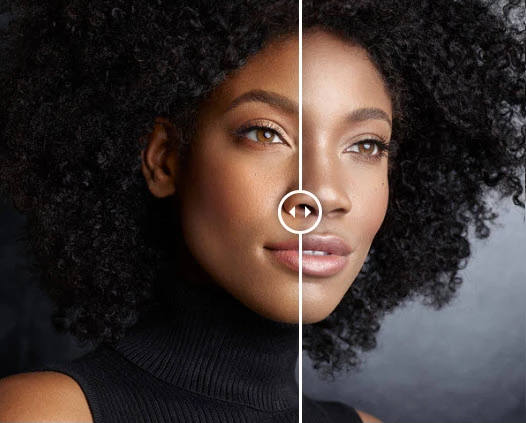
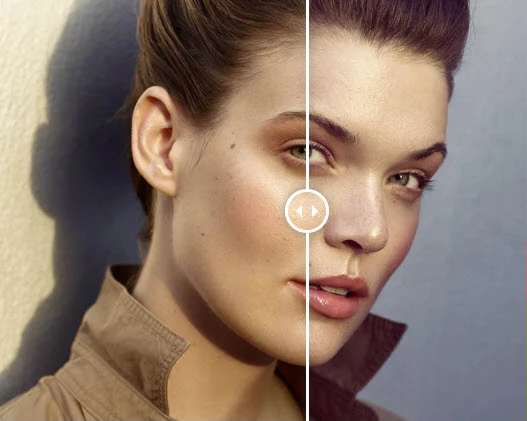
Imagine a fashion shot where the lighting and the model’s pose are perfect, but the skin looks slightly yellow, giving an artificial feel. A simple skin color correction removes the yellow, leaving natural and healthy-looking skin. Then, applying a subtle, stylish grade can transform the image from average to a professional, eye-catching photo.
As photographers say, skin color correction and grading are what make a photo alive and breathing. Without these steps, even the best lighting and pose can’t make a photo truly appealing.
How Did We Work Before This Tool?
Before these styles existed, skin color correction and grading were time-consuming and tedious.
Everything had to be done manually:
- Adjusting White Balance and Exposure for each photo
- Tweaking Curves and Levels to make colors look more natural
- Applying masks and correcting areas one by one
Even with all that effort, results weren’t always perfectly natural.
Especially during a photoshoot with multiple shots, this process could consume enormous time and energy—and sometimes leave photographers or retouchers frustrated.
In reality, without the right tools like Capture One Editorial Style Pack, achieving natural, professional-looking photos required patience, and the results were never guaranteed.
Now There’s an Easy Way: Capture One Editorial Style Pack
Now, you don’t have to spend hours on Curves, Levels, and masks. The Capture One Editorial Style Pack was created specifically to make skin color correction and grading achievable in just a few clicks.
Skin Color Correction
- Removes yellow/green tints that make skin look dull or sick
- Eliminates red/magenta tints that can make faces look artificial
- Allows you to adjust intensity with Opacity to get the exact natural tone you want
Final Grading
- Color: Studio Chill, Studio Warmth, Cool Summer, Retro Summer — each gives a unique mood to your photo
- Black & White: Black & White Portrait — sleek and classic
- Bonus Styles: Retro Pop, Cooldown, High Contrast B&W — for creative touches
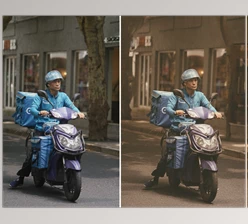
With Capture One Editorial Style Pack, your subject’s skin instantly looks natural, and the image gains a professional, lively, and eye-catching feel—without spending hours or creating multiple mask layers.
In our words, it’s like a magic click that transforms ordinary photos into portraits you can’t take your eyes off.
Pro Tips for Using the Pack
A few simple tips can make your results look highly professional and natural:
1. Correct Skin Color Before Retouching
This golden step makes the subsequent retouching faster and ensures a more natural result.
2. Play with Layer Opacity
Each style is on a separate layer, so you can increase or decrease its intensity. This gives full control over the final look and ensures the color is exactly as you want.
3. Combine Styles
Sometimes, using multiple styles together can create a unique, creative mood. Experimenting with combinations can make your images stand out.
4. Consistent Grading for a Series
When you have several portrait or fashion shots, applying a consistent grade makes the entire series cohesive, visually pleasing, and professional.
💡 Golden Tip: Always create a test layer and try the styles gradually to find the best result without making colors look exaggerated or artificial.
Why This Tool Is Worth It
Capture One Editorial Style Pack is a true time-saver and a skin color magician! With a few simple clicks, skin tones become natural, and photos gain a lively, professional vibe. Not only do the colors look accurate and realistic, but each image also acquires a style and mood that elevates your projects from ordinary to professional.
With some experimentation with layers and styles, you can create a cohesive and attractive photo series—whether portraits or fashion shots. When you have Capture One Editorial Style Pack, your photos don’t just look good—they look professional, unique, and stunning, without taking hours of your time.

Files Password : gfxplugin.com OR 123456