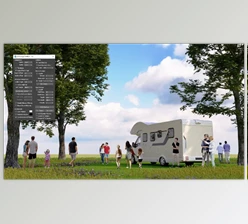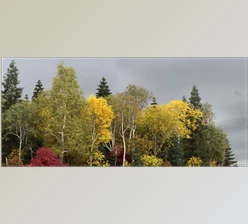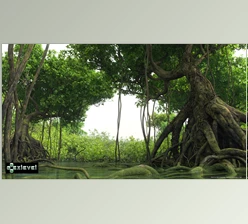
AvizStudioTools ATree3D v3.11 for 3ds Max 2018-2024: ATree3D is a simple-to-use 3D plant generator to create architectural visualizations. With this 3D script max, you can make trees, bushes, shrubs, flowers, and grass. You can use it to create low and high polygon models that precisely control the detail amount on every sub-element. The script works within the 3ds Max viewport and gives you a live preview of your changes.
Add UI Buttons and Shortcuts:
To add a keyboard shortcut or toolbar button, go to 3ds Max's menu and choose to customize > customize user interface... Then, under the "Keyboard" or "Toolbar" tab, choose Main UI Group and the Category AvizStudioTools. Set a keyboard shortcut for "ATree3D" from the "Keyboard" tab or the "Toolbar" tab. Drag and drop "ATree3D" to a new or existing toolbar to create a UI button for your program (for Windows 7 or Vista, you might need to run 3ds Max as an administrator).
Interface:
BUILD / PREVIEW
- "Build Tree(s) Button With this Button, if you click the [Edit->] is turned off, you can create multiple trees. The script will change the tree's parameters each time based on parameter variations. To stop the building of trees, click the right mouse button or escape. If the [Edit button is active, [Build Tree(s)[Build Tree(s)] Button completes editing and building the edited tree.
- [Previousbutton Click this Button to modify your trees. When the Button is pressed, the script asks users to select a location to show a preview of the tree. If the user chooses a good position script will build an overview of the tree that has been edited. Then, it opens the parameters to the right of the icon. Once you are satisfied you are ready, press the Button again to complete the editing process.
- [Open] Button - Click to open the ATrees3D file and add models to this list. If the script discovers a material library data (.mat) with identical names within that directory, it will add this file to the scene.
- [Save Click - Save edited trees or the tree list to an archive
- "[Opt ...] Button -- Raneme load defaults, load the list, or edit the listing of items.
- [List of Trees [List of trees] - Trees currently loaded. Click on the tree's name to load the model.
GLOBAL VARIATIONS
- Seed Based on this particular number, every variation of the parameters of the tree are determined.
- Angle Variation of angle for user-defined angles.
- Length Then, specify the percentage of variation in the length of user-defined elements.
- Leaves You can specify the percentage of Length and Angle values to determine the variation in leaves.
- skip - Enter the maximum amount of elements to be removed when creating the tree.
- Rotate The maximum angle is the in the tree's trunk.
- Scale Next The maximum amount of differences between first tree and next trees built when creating multiple trees.
COLOR / FILTERS
- Colors is the term used to define the wire color of the trunk, first-level branches, branches at the next level, and leaves.
- Edit [S Edit [S Create only two branches at the first Level for the preview to increase the speed of updating previews. This feature doesn't affect what will be the final tree.
- Edit [M Edit [M] When the script is on, it applies the material to the tree preview.
- Edit [T Edit [T When enabled, the script is on, creating a preview of the tree.
- Edit [F Edit [F] - If turned on, the script creates an overview of the first-level branches.
- Edit [N Edit [N If on the script, it generates a preview of the upcoming levels branches.
- Edit [L Edit [L If on the script, it generates an image of leaves.
- Build [M Build [M] When it is on, the script adds materials to create the tree.
- Build [T Build [T When the script runs, it builds a trunk.
- Build [F Build [F] If the script runs, it creates first-level branches.
- Build [N Build [N If it is on, the script will build the next level branches.
- Build [L Build [L - The script stops building once on.
- Attach [T Attach [T] Once turned on, the script connects all trunks.
- Attach [F Attach [F If the script is on, it attaches the first-level branches to the trunk.
- Attach [N Attach [N - Once the script is on, it attaches the branches at the next level to the trunk.
- Attach [L Attach [L - Once on, the script joins at the root.
- Separate[T Separate[T If it is turned on, the script will separate each trunk to separate objects.
- Separate[F Separate[F] If activated, the script will separate the first level branches for each object.
- Separate[N Separate[N - If on the next level, scripts separate branches into each object.
- Separate[L Separate[L - The script will separate all leaves into individual objects if turned on.
MATERIALS
- Materials menu dropdown Select one of the materials from the dropdown menu.
- "Add New Material" ...] Button Select a material from the scene to the tree currently used.
- [X] button - remove current material.
GLOBAL PARAMETERS
- Trunks Set the number of trunks of the tree. Each trunk has its form and location.
- Branch Levels Choose the number of branch sub-levels. Each Level has its own set of parameters.
- Leaves Types Set the number of leaf types. Each type comes with its own set of parameters.
- Branch MinRadius Set the minimum radius for branches.
- World Parameter Slider - The tree structure is scaled. The left corner equals 50%, while the right corner equals 200%.
LEVEL PARAMETERS
- level dropdown menu (LDM). Choose the tree Level you wish to modify. In this list, the T+ number is the Level of the trunk. The B+ number indicates branch level, and the L+ number indicates leaf type. {The bracket script displays the selected object's title in the brackets. To change this name, press the [Shape] Button, alter the selected object's name, then press [Shape] again.
- [Position] button Define the location of the elements on a particular degree.
- [Direction Button Define the direction of growth at the selected Level.
- [Scale] button Define the dimensions of elements at the chosen Level.
- [Radius] button Define the radius at the Level you want to define.
- [Shape] button to enter shape modification mode. Modify the Shape of the element. When completed then, press the Button again.
- [Pick] button Select an object in the scene of the Level you want to choose.
- Sides Set the number of sides on the chosen branch or trunk.
- Subdivision - Set the number of branch or trunk form subdivisions for the Level you selected.
- Count - Set the number of elements at the chosen Level.
- Multi - - Multiply the number of leaves or branches. (New with version 1.1)
- Radius Mul Set the radius of the beginning of the Level you wish to set by multiplying that of the parent branch's radius with the resultant value. If the value of this parameter is 0.5, the radius of the branches is half the diameter of the parent branch's radius. If it is set at 1.0, the radius of the beginning of branches is identical to that of the parent branch.
- Spiral Steps: Set the number of branches or leaves needed to complete the 360-degree turn around the parent trunk or branch.
- Level Parameter Slider scales the elements of the Level you choose to scale. The left corner equals 50%, while the right corner equals 200%.
- From to Level Set the selected leaf level to generate leaves up to the branch level. If the second option is set at -1, the leaves are generated starting from the first value set to the final branch level in the tree.
- Distance - Set the distance between leaves. The value can be changed only if the Count value has been set to zero.
- Employ Parent Scale - Set the amount in the parents' scale to be applied on this leaf. If the value is set to 0.0, the value of the parent scale is ignored. If you set it to 1.0, leaves at this Level are sized with 100 percent of the value of the parent scale.
- Maximum Tilt Angle Set the max tilt angle of leaves centered around the X local axis. This is independent of Variation values and can be individually set for different kinds of leaves.
[Rx [Rx Rotate the element of the selected Level around the X axis 90 degrees.
[Ry [Ry Rotate the chosen level element around the Y-axis by 90 degrees.
[Rz [Rz Rotate the selected Level elements around the Z-Axis by 90 degrees. - [Auto Align] - Auto-align selected level element.
- MatID From to Set Material ID for elements within the Level you choose. If the two values do not match, the material ID can be randomly chosen between the first and second values. The script will use a default material ID for elements if both values are zero.
- Map Tile UV - Set the UV map tile for trunks and branches.
Advanced Parameters (New Version 3.00)
- The dropdown menu of levels (LDM). Choose the Level of the tree you wish to alter.
- Volume Constraints - Set the volume limit at each stage.
- Surface Constraints - Set the surface constraints for every Level.
- Blend orientation - Blend two different orientation types.
- Vertex Color Set the vertex colors for the Level's geometry.
Advanced Variations (New Version 3.00)
- The dropdown menu for levels (LDM). Choose the branch level you wish to alter.
- Shapes Parameters - Set different variations for the Shape of the Level.
- Sections Parameters - Set different parameters for the sections at the section.
- Noise Parameters: Set noise variations for the shapes and sections of the stage.
- Local Variations: Overwrite global variables for the Level you have selected. (New with version 3.02)
Download AvizStudioTools ATree3D v3.11 for 3ds Max 2018-2024 from the below link now!
Dear user, you must first login to your account to write your comment.
Please click here to Log in

Files Password : gfxplugin.com